
Configure Your Shopping Cart and Checkout
Set currency, order notifications, the Continue Shopping destination, cart navigation and confirmation messaging.
Choose how customers add products, return to your shop, and see their order confirmation. These settings also control where your team receives order notifications.
Before you begin
Open the correct site in your dashboard. To accept orders, connect a payment provider, add purchasable products, and configure fulfillment for physical items.
Set currency and order notifications
- Open Commerce and select General.
- Choose your store's Currency. Review existing product prices before changing it; do not assume that changing the currency recalculates your intended prices.
- Enter your Order Notification Email. Separate multiple addresses with commas, or leave the field blank to use your account email.
If Square is connected, your store must use the currency that your Square account processes. A mismatch warning identifies the currency you need to select.
Choose your shop destination
- Select Store Experience.
- Beside Shop Page, select Change.
- Choose the page customers should return to when they select Continue Shopping.
Use a page that helps customers browse your catalog. You can feature products or link to your product categories.
Enable the cart and navigation link
- Select Cart & Checkout.
- Turn on Enable Shopping Carts so customers can collect multiple items before paying.
- Choose Show Cart in Site Navigation:
- Never hides the automatic navigation link.
- Always shows it even when the cart is empty.
- When Not Empty shows it after a customer adds an item.
- Enter an Order Confirmation Message. This appears after successful checkout; use it for a short thank-you or useful next steps.
- Select Save. Republish your site if prompted.
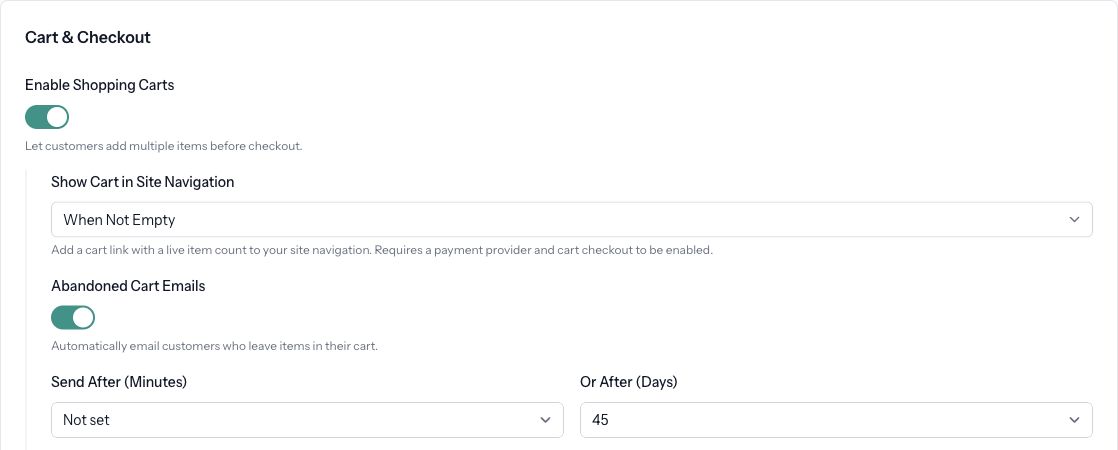
The navigation cart requires a connected payment provider and cart checkout. If your site has coupons, cart checkout remains required; you cannot turn it off while those coupons exist.
For follow-up messages to shoppers who do not finish checkout, see Recover Abandoned Carts. Cart Page Tracking Code is an optional field for tracking code you intend to run in the cart-page footer; it is not needed to enable shopping carts.
Check the customer experience
Open the published site, add a product to the cart, and confirm that the navigation link behaves as selected. Check Continue Shopping and review the cart's currency and product prices.
If the cart link is missing, verify the payment connection, cart setting, and navigation visibility choice. When Not Empty will not display a link in an empty cart. If the published site still shows earlier settings, save and republish it.
If order notifications go to the wrong person, check the comma-separated addresses in Order Notification Email. Leaving it blank sends notifications to the account email.