Website Editor Overview
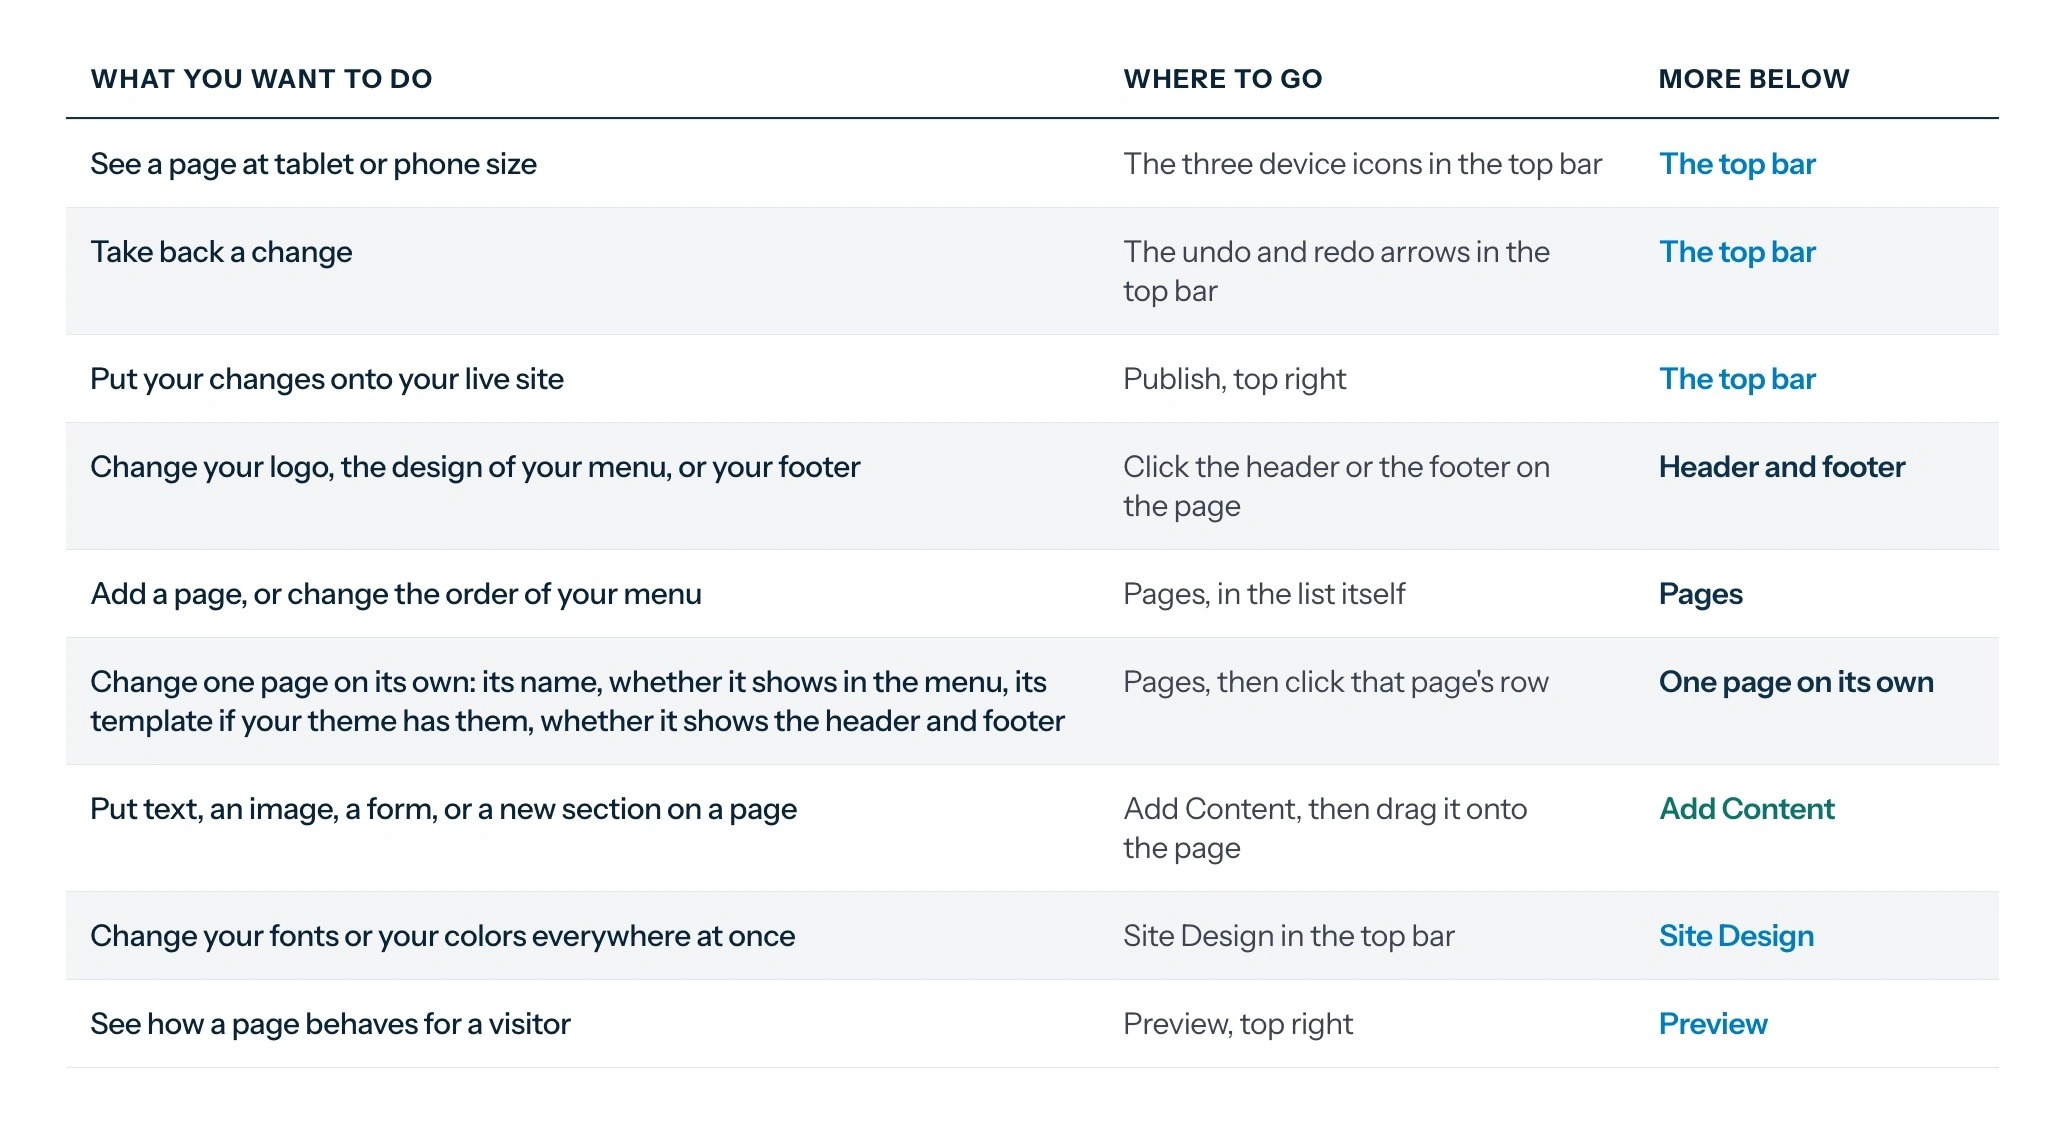
A quick tour of the editor, so you know where to go for the change you want to make.
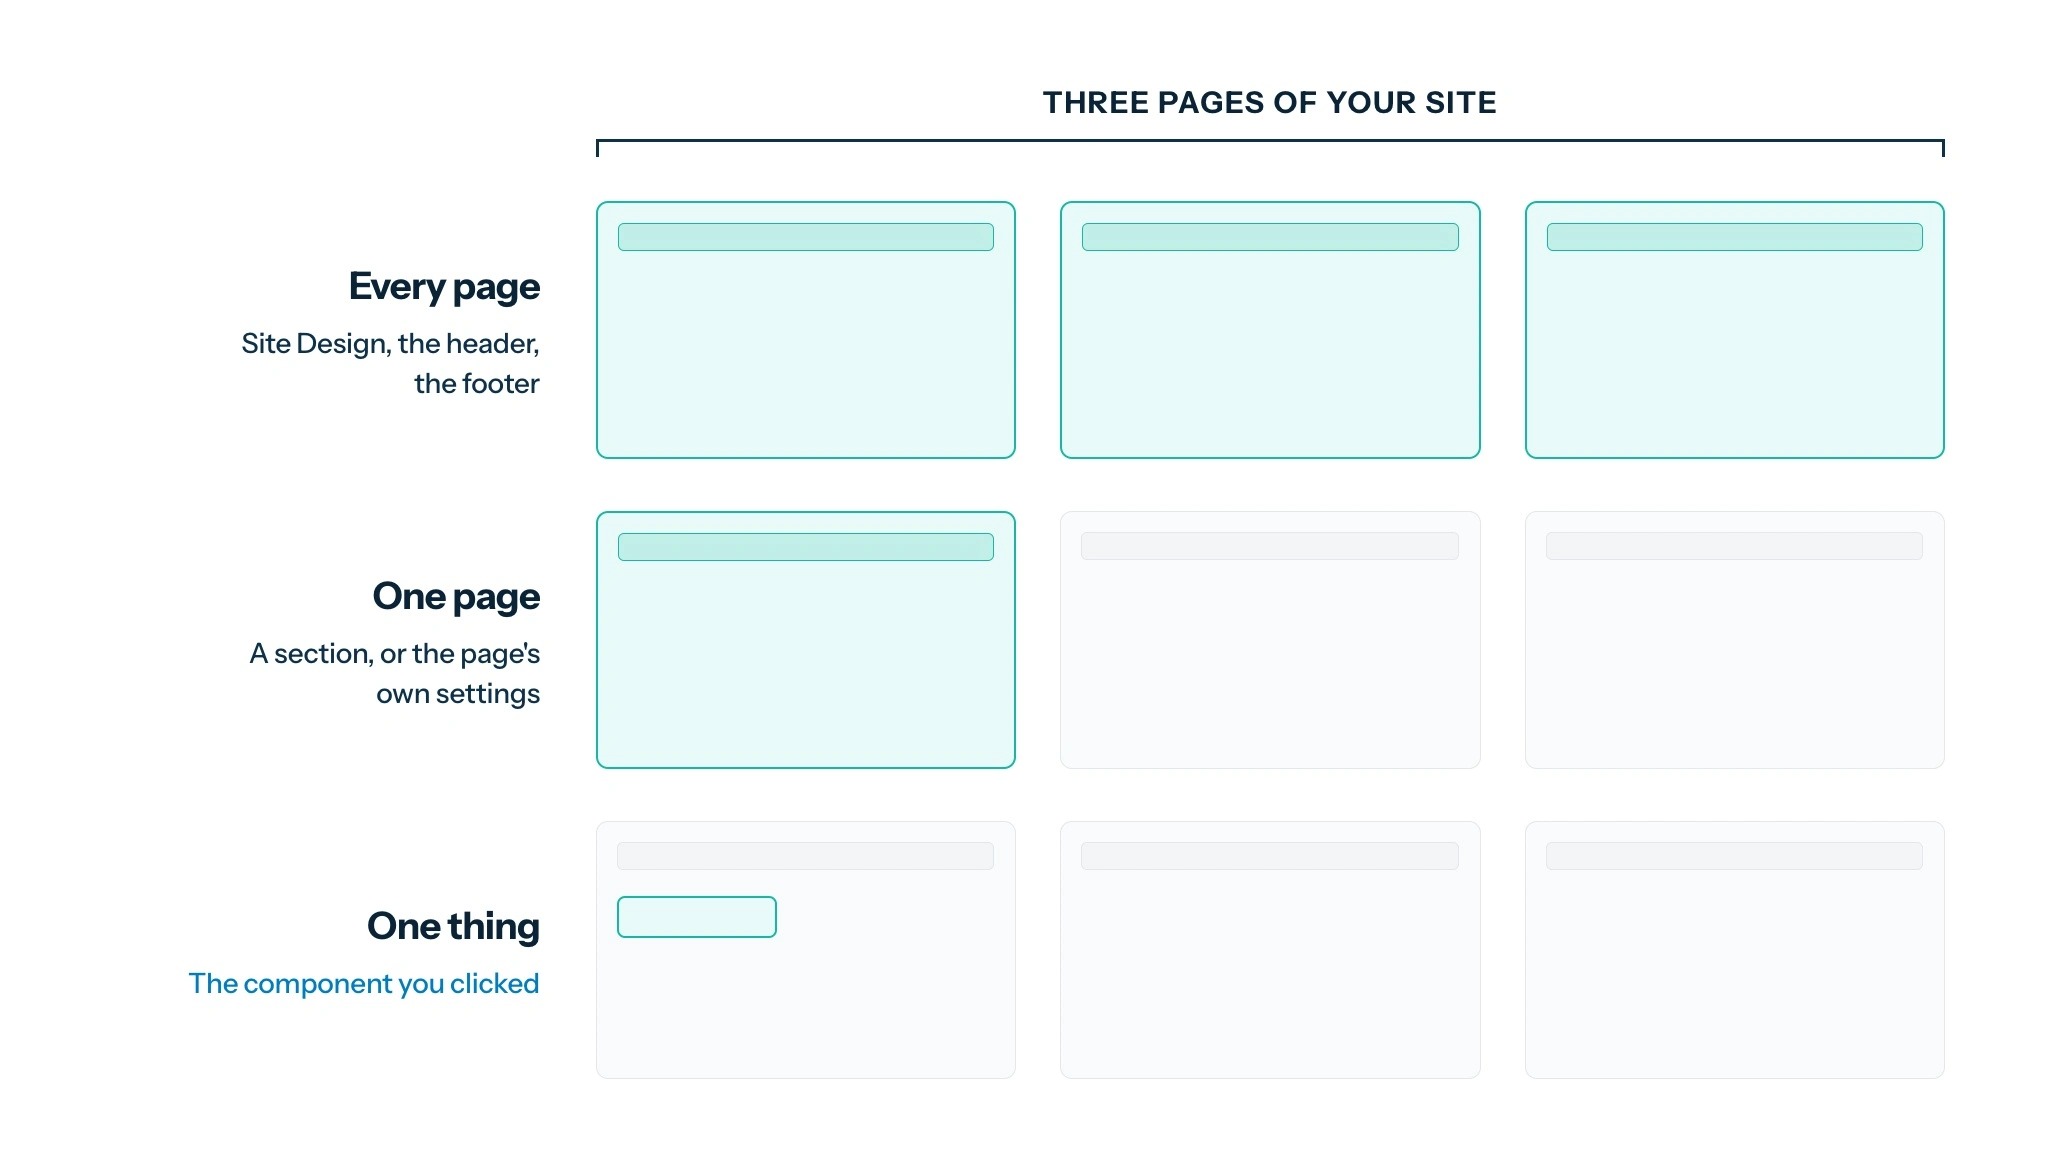
Tip: Where you make a change decides how far it reaches.
Where To Go for What
1.
2.
The Top Bar
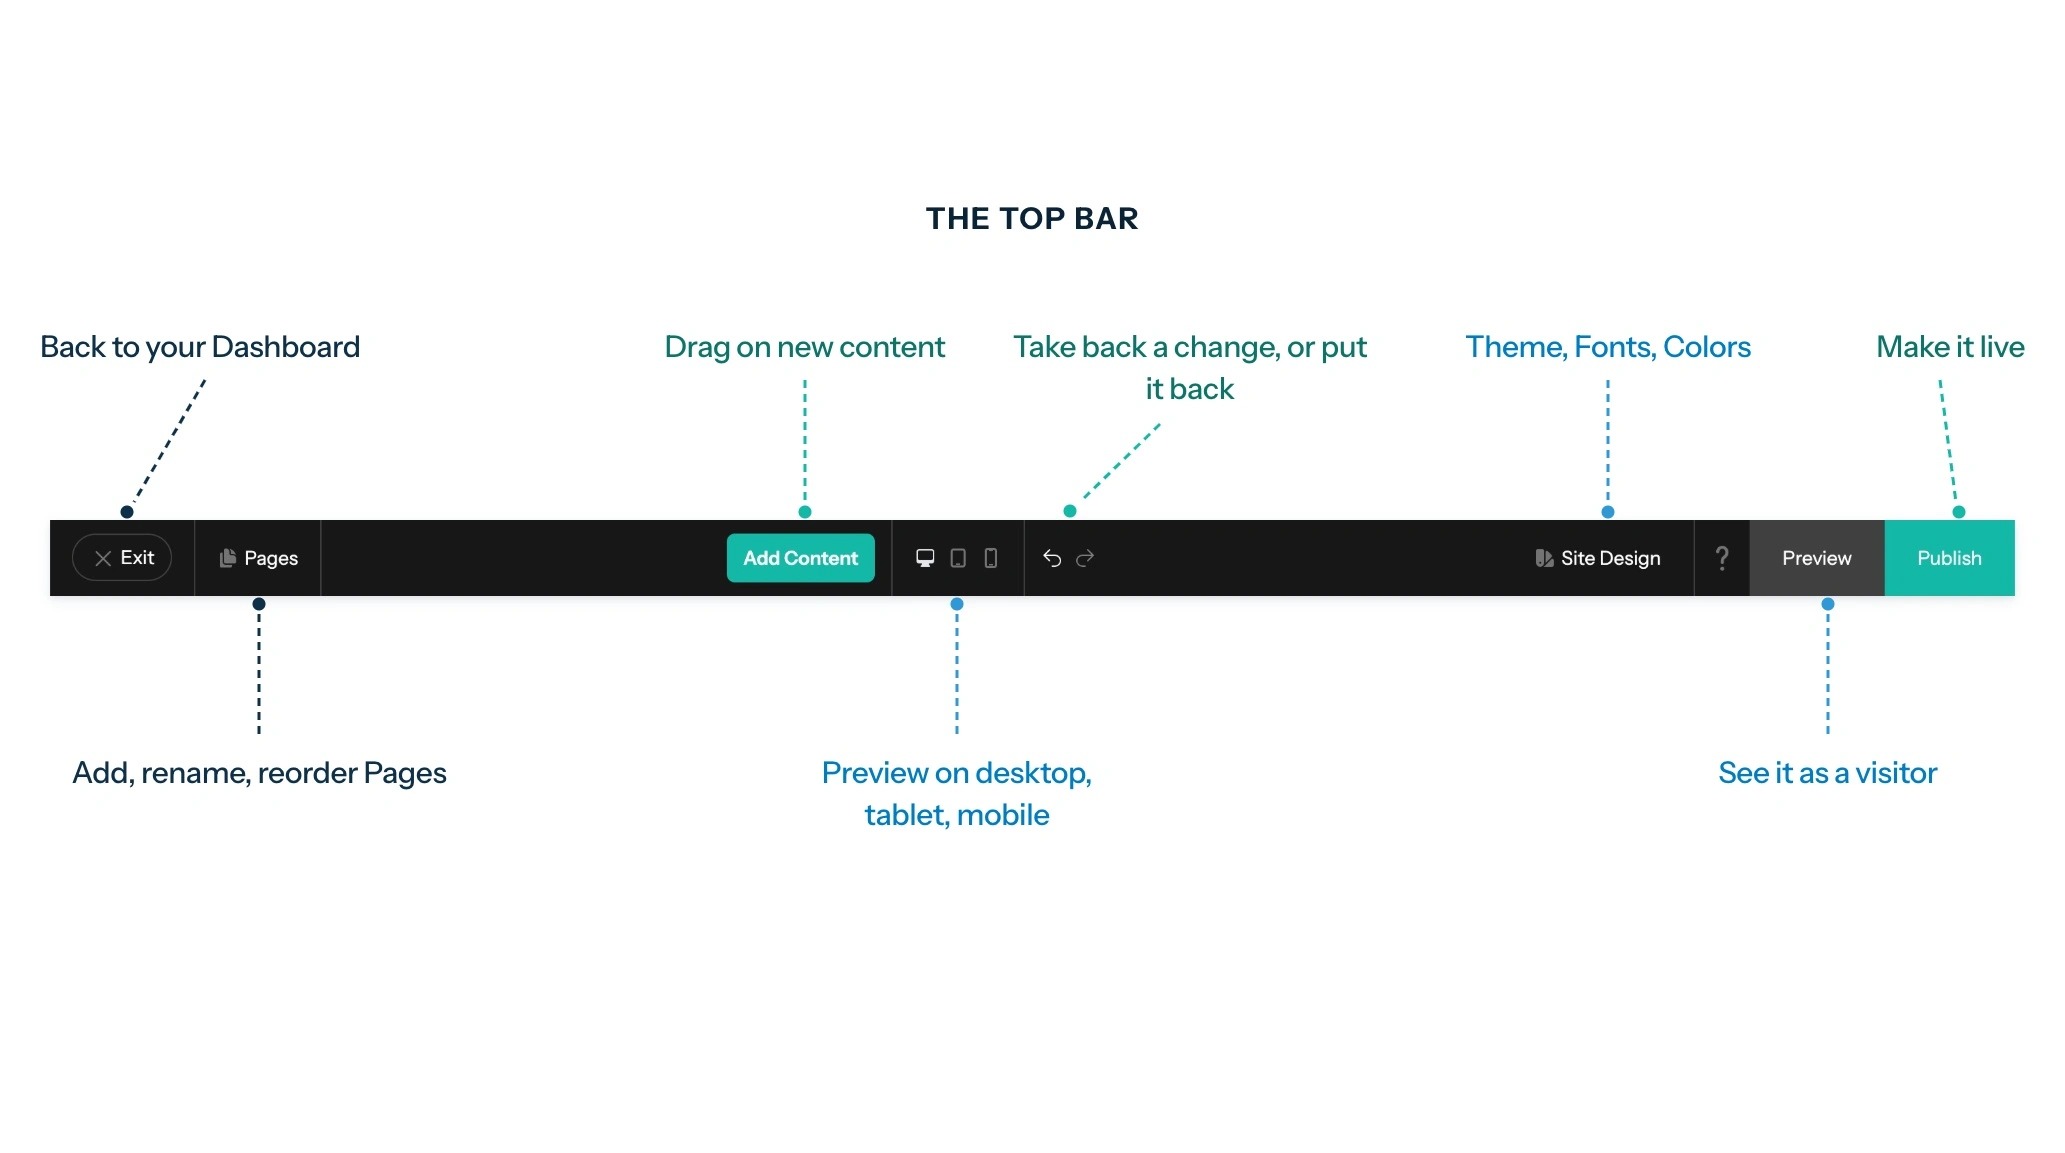
3. The top bar is the same on every page, and it does three different jobs:
- Pages, Add Content, and Site Design open the other editor areas.
- The three device icons, the undo and redo arrows, and Preview are how you check your work as you go.
- Publish, at the far right, applies your changes to the live site.
Until you click Publish, everything you have done stays in the editor.
Tip: Undo and redo still work after you leave the editor and come back.
- They step back structural changes: adding or removing a section, moving a block, changing a setting.
- What they do not step back is the words inside a text block, which is why the arrows can look unresponsive right after you type.
- For your own typing, or a word you made bold, use Ctrl+Z on Windows or Cmd+Z on a Mac. Add Shift to either one to redo.
Header and Footer
4. The header is a global area and the footer a global section, the only two parts of your site that appear on every page.
Edit either one, and the change shows everywhere, which is why your logo and menu live in the header rather than on each page separately.
The header has a panel of its own, grouped by what it holds, and it opens from the header background.
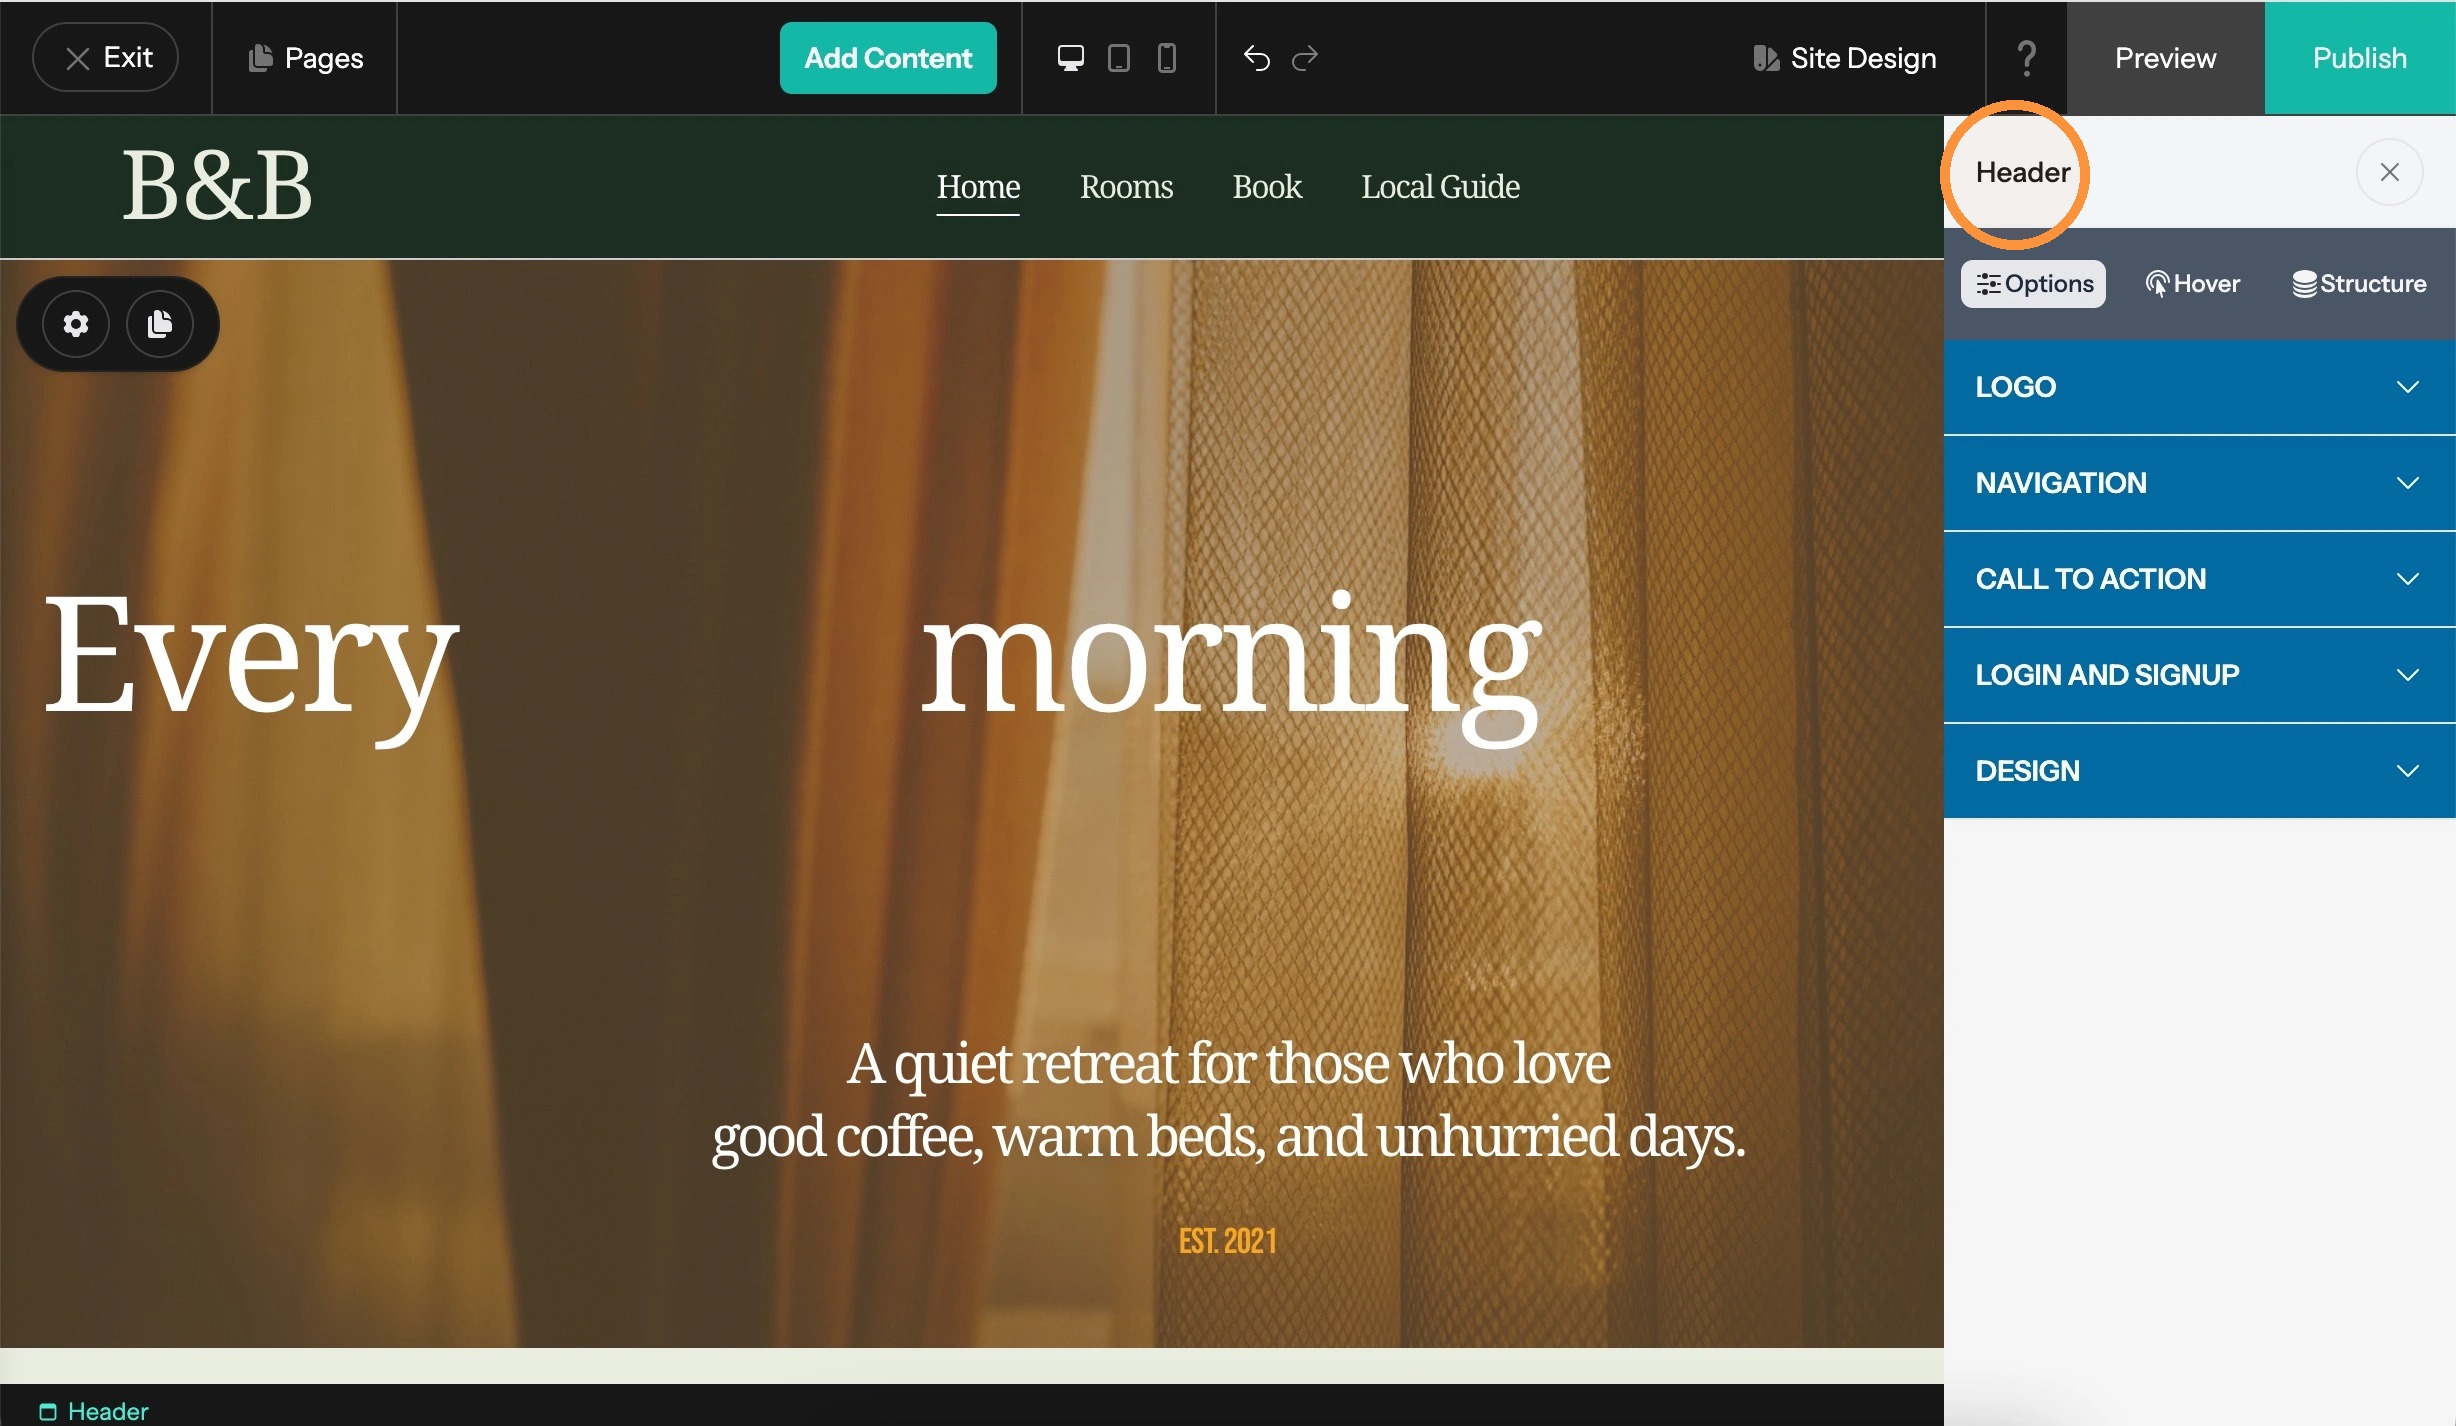
Tip: The footer is built like an ordinary section instead. You fill it with the components you want, and its panel carries the same groups as any section on a page.
Pages
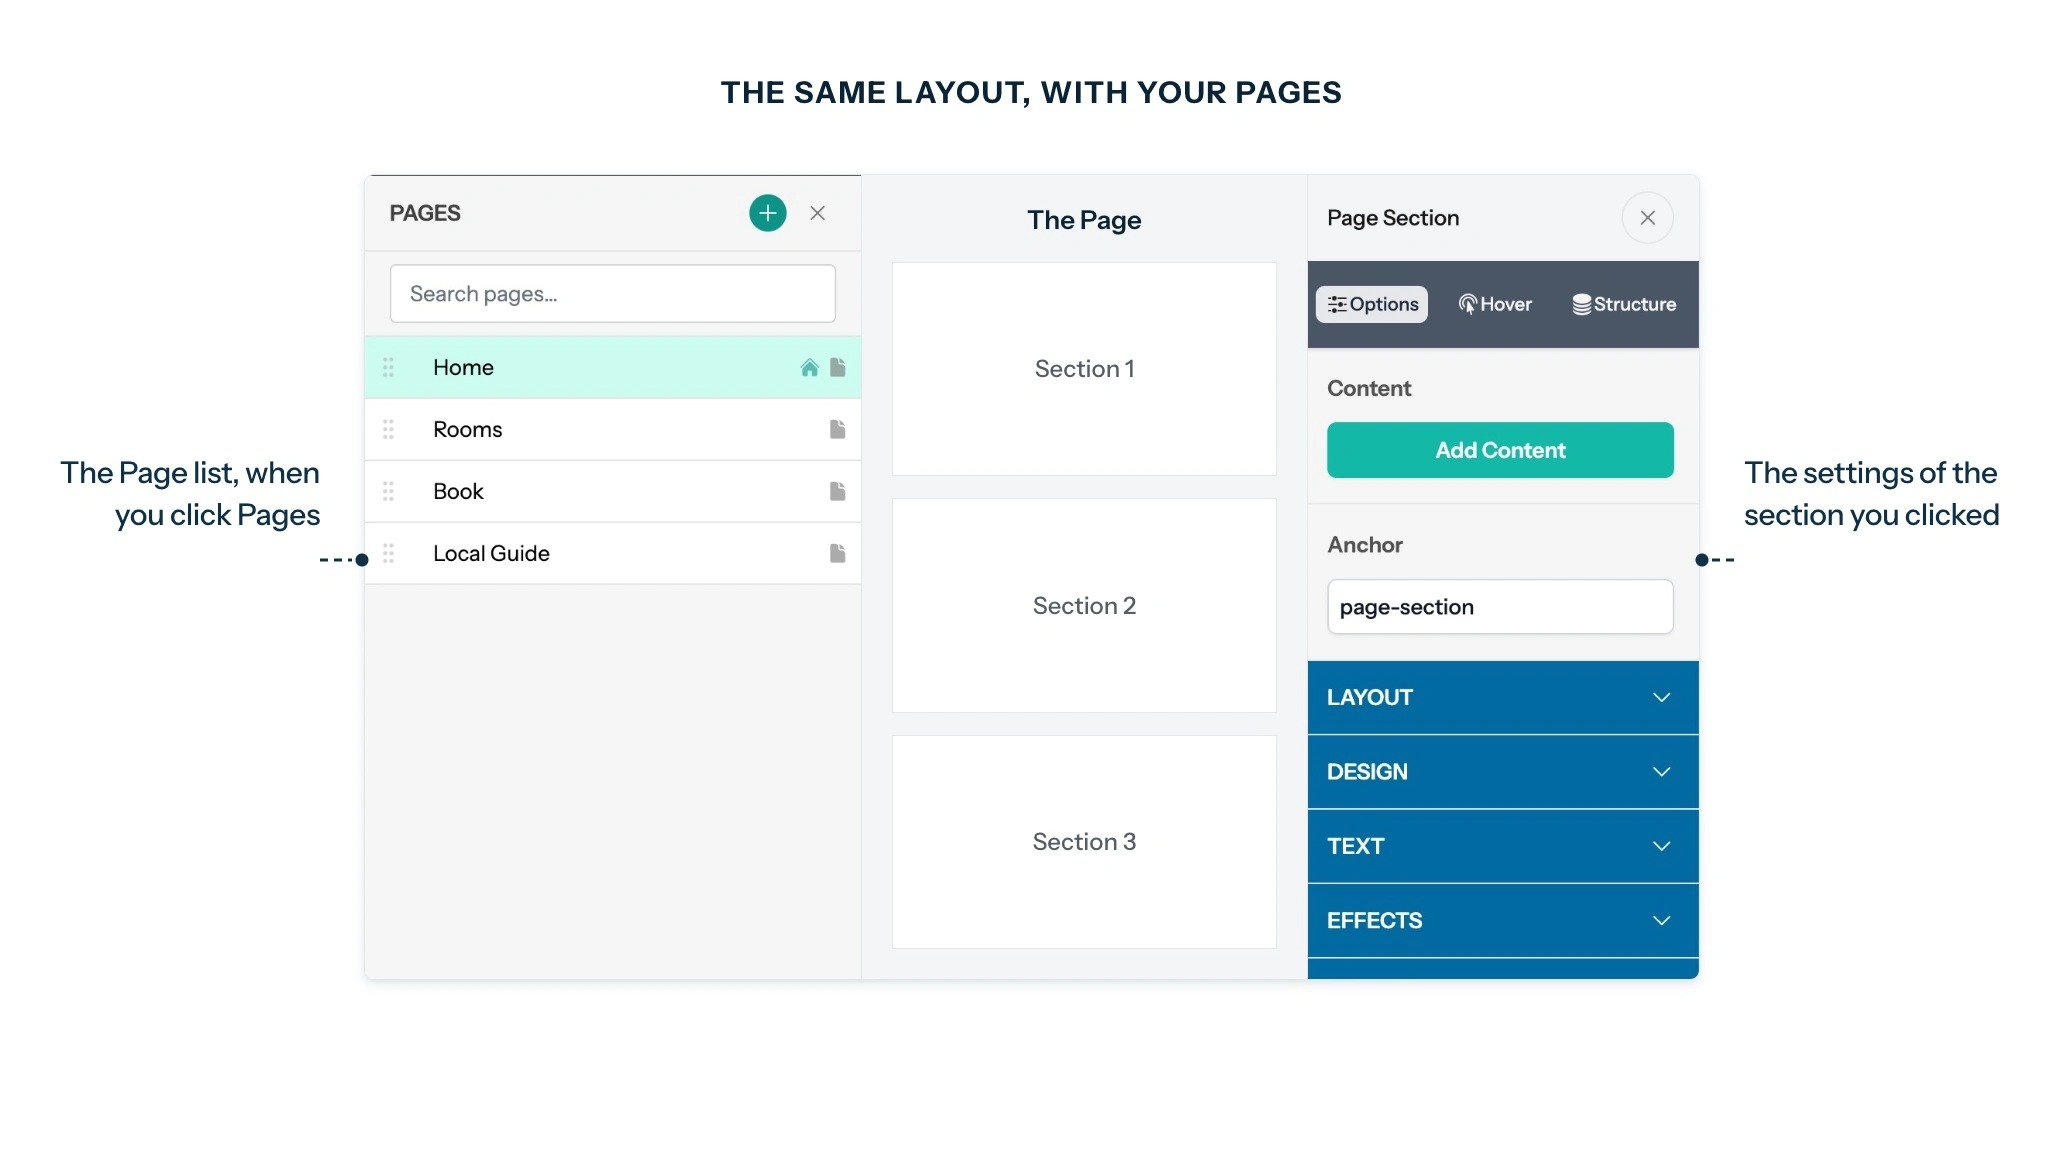
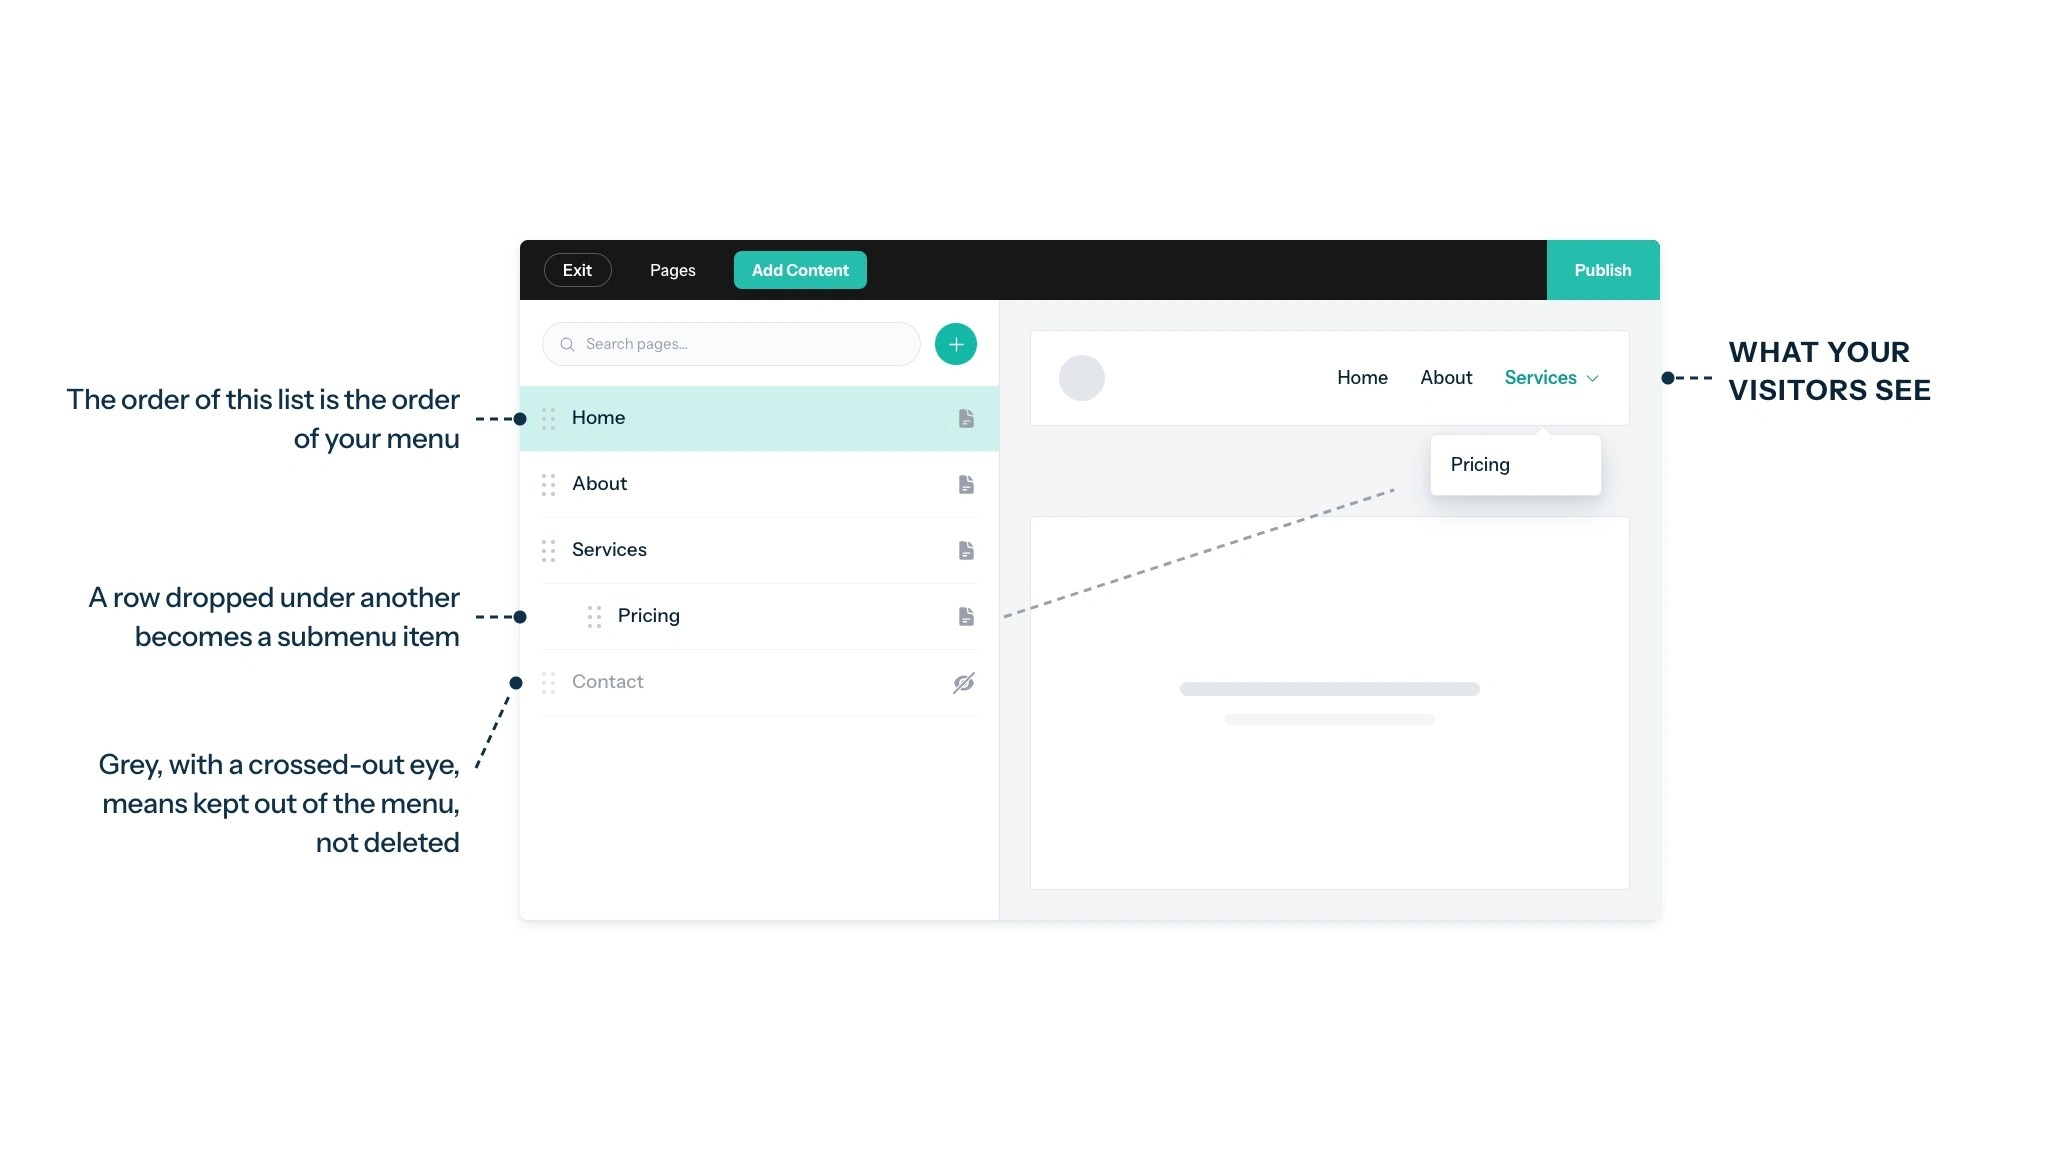
5. Pages hold the structure of your site:
Which pages exist, which of them appear in the menu, and in what order?
It is also how you move from one page to another while you work.
The list is also the menu, so where a row sits is where visitors find it.
One Page On Its Own
6. Click a row, and the panel switches to that page automatically, with everything for that page together: its name, whether it appears in the menu, its settings, and how it appears in search results.
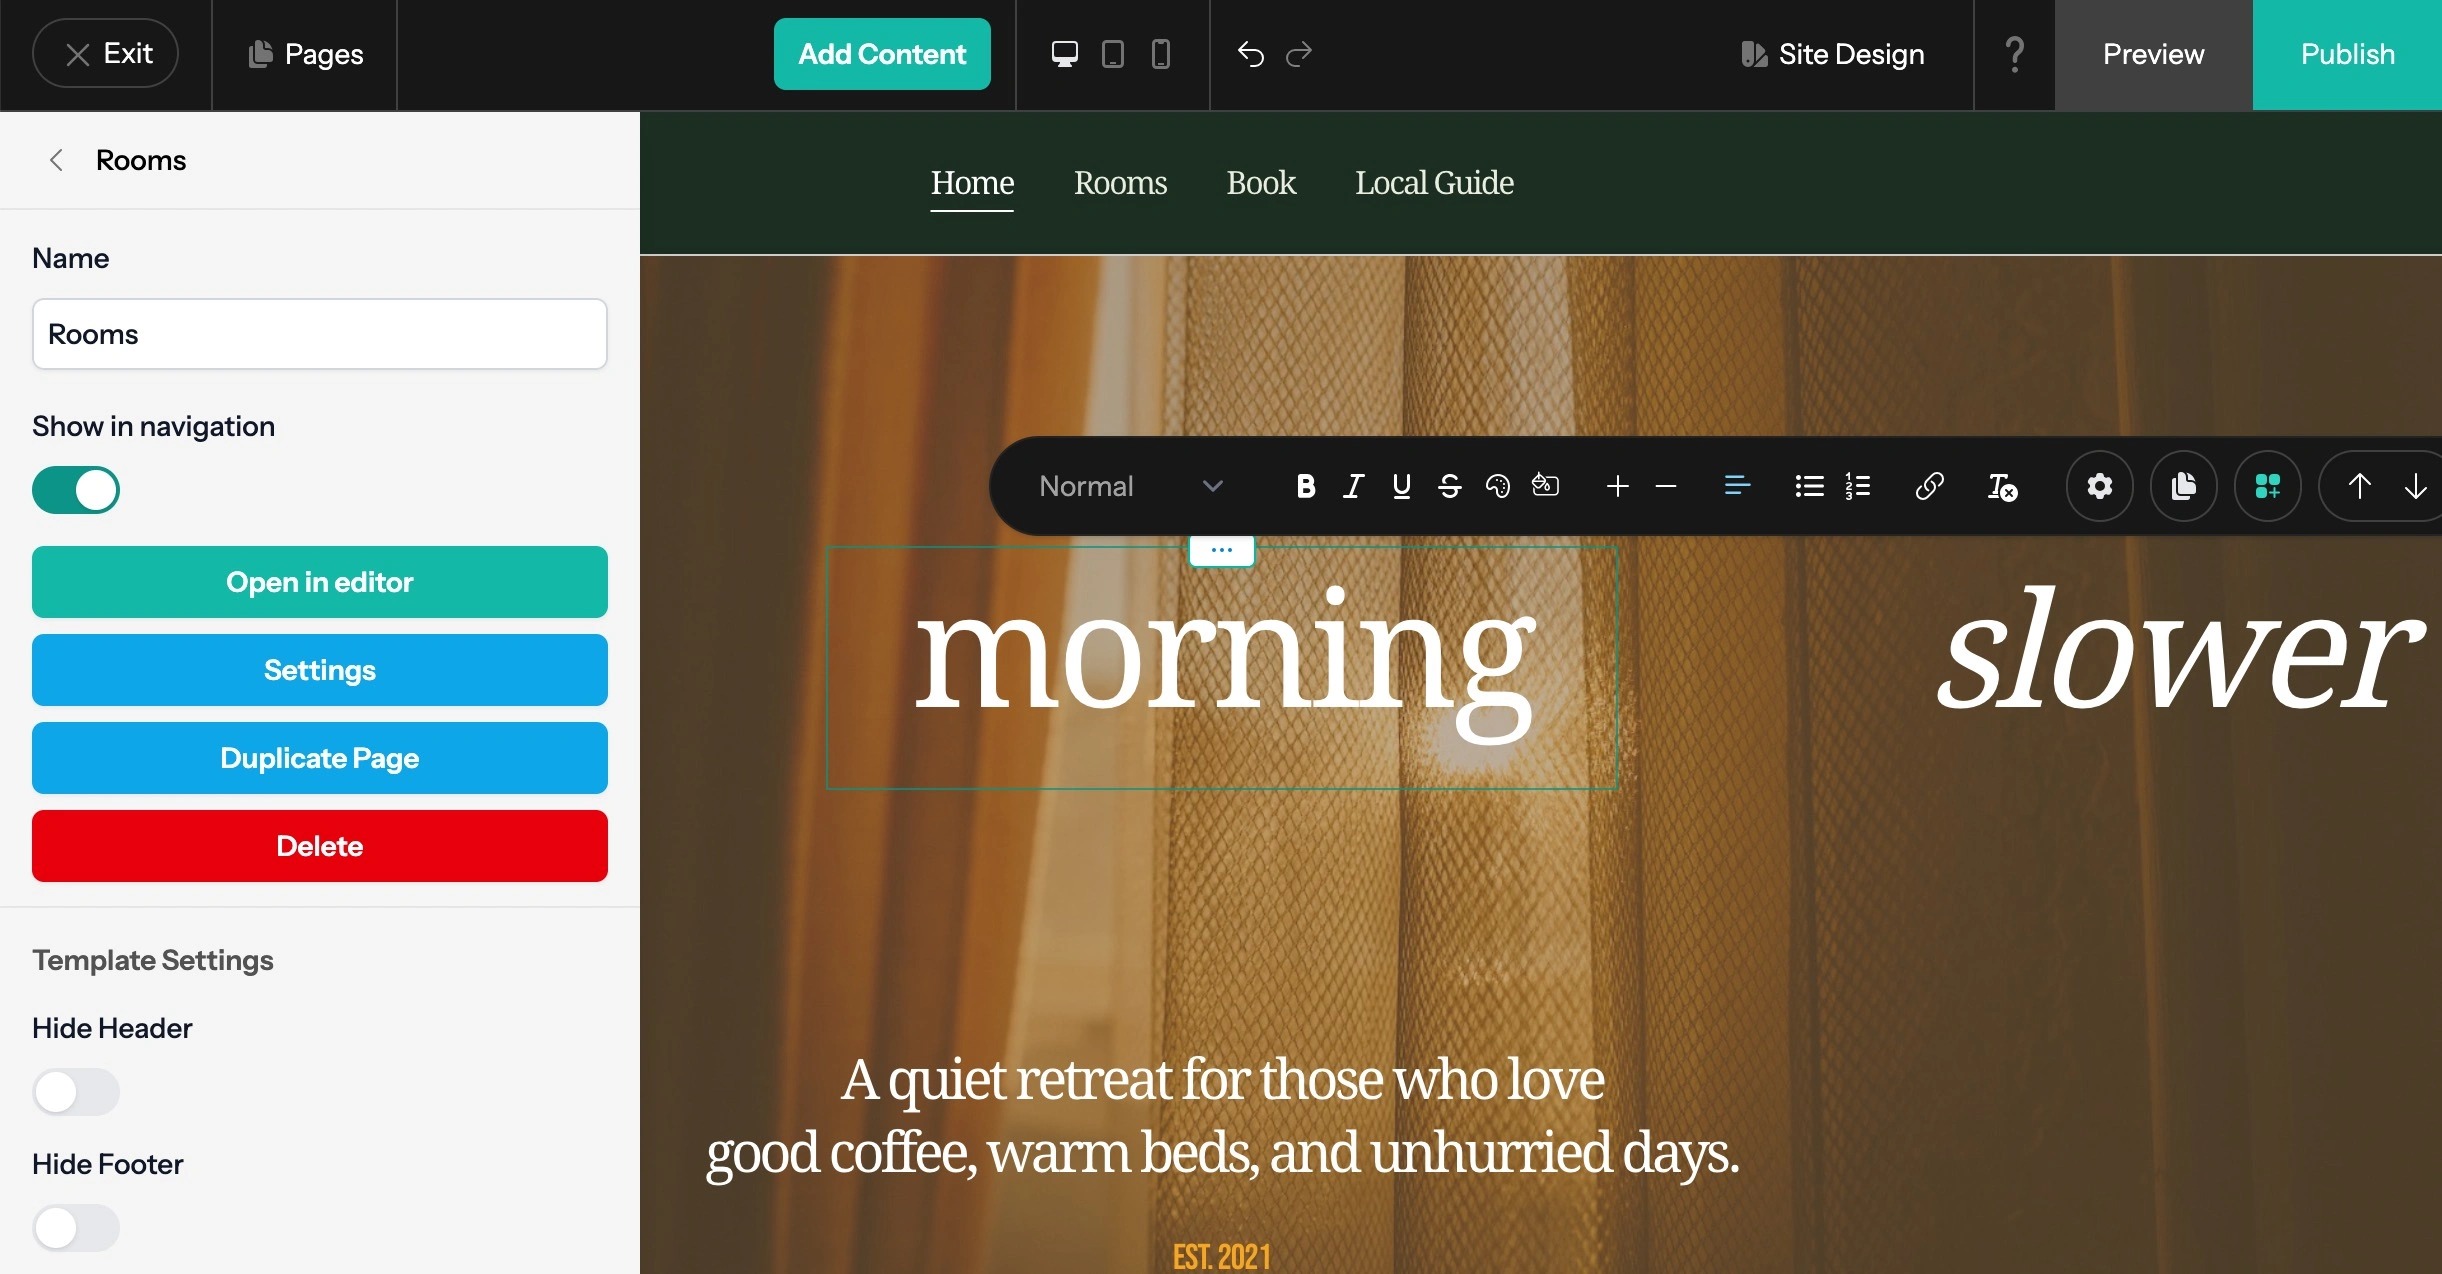
Tip: Two settings in that panel are easy to miss:
- Template switches the page to a different template, and it only appears on themes that include templates.
- Hide Header and Hide Footer drop either one from this page, and leave every other page alone.
The Page In Front Of You
7. The middle of the screen is the page itself, not a preview. What you change there stays on that page, apart from the header and footer.
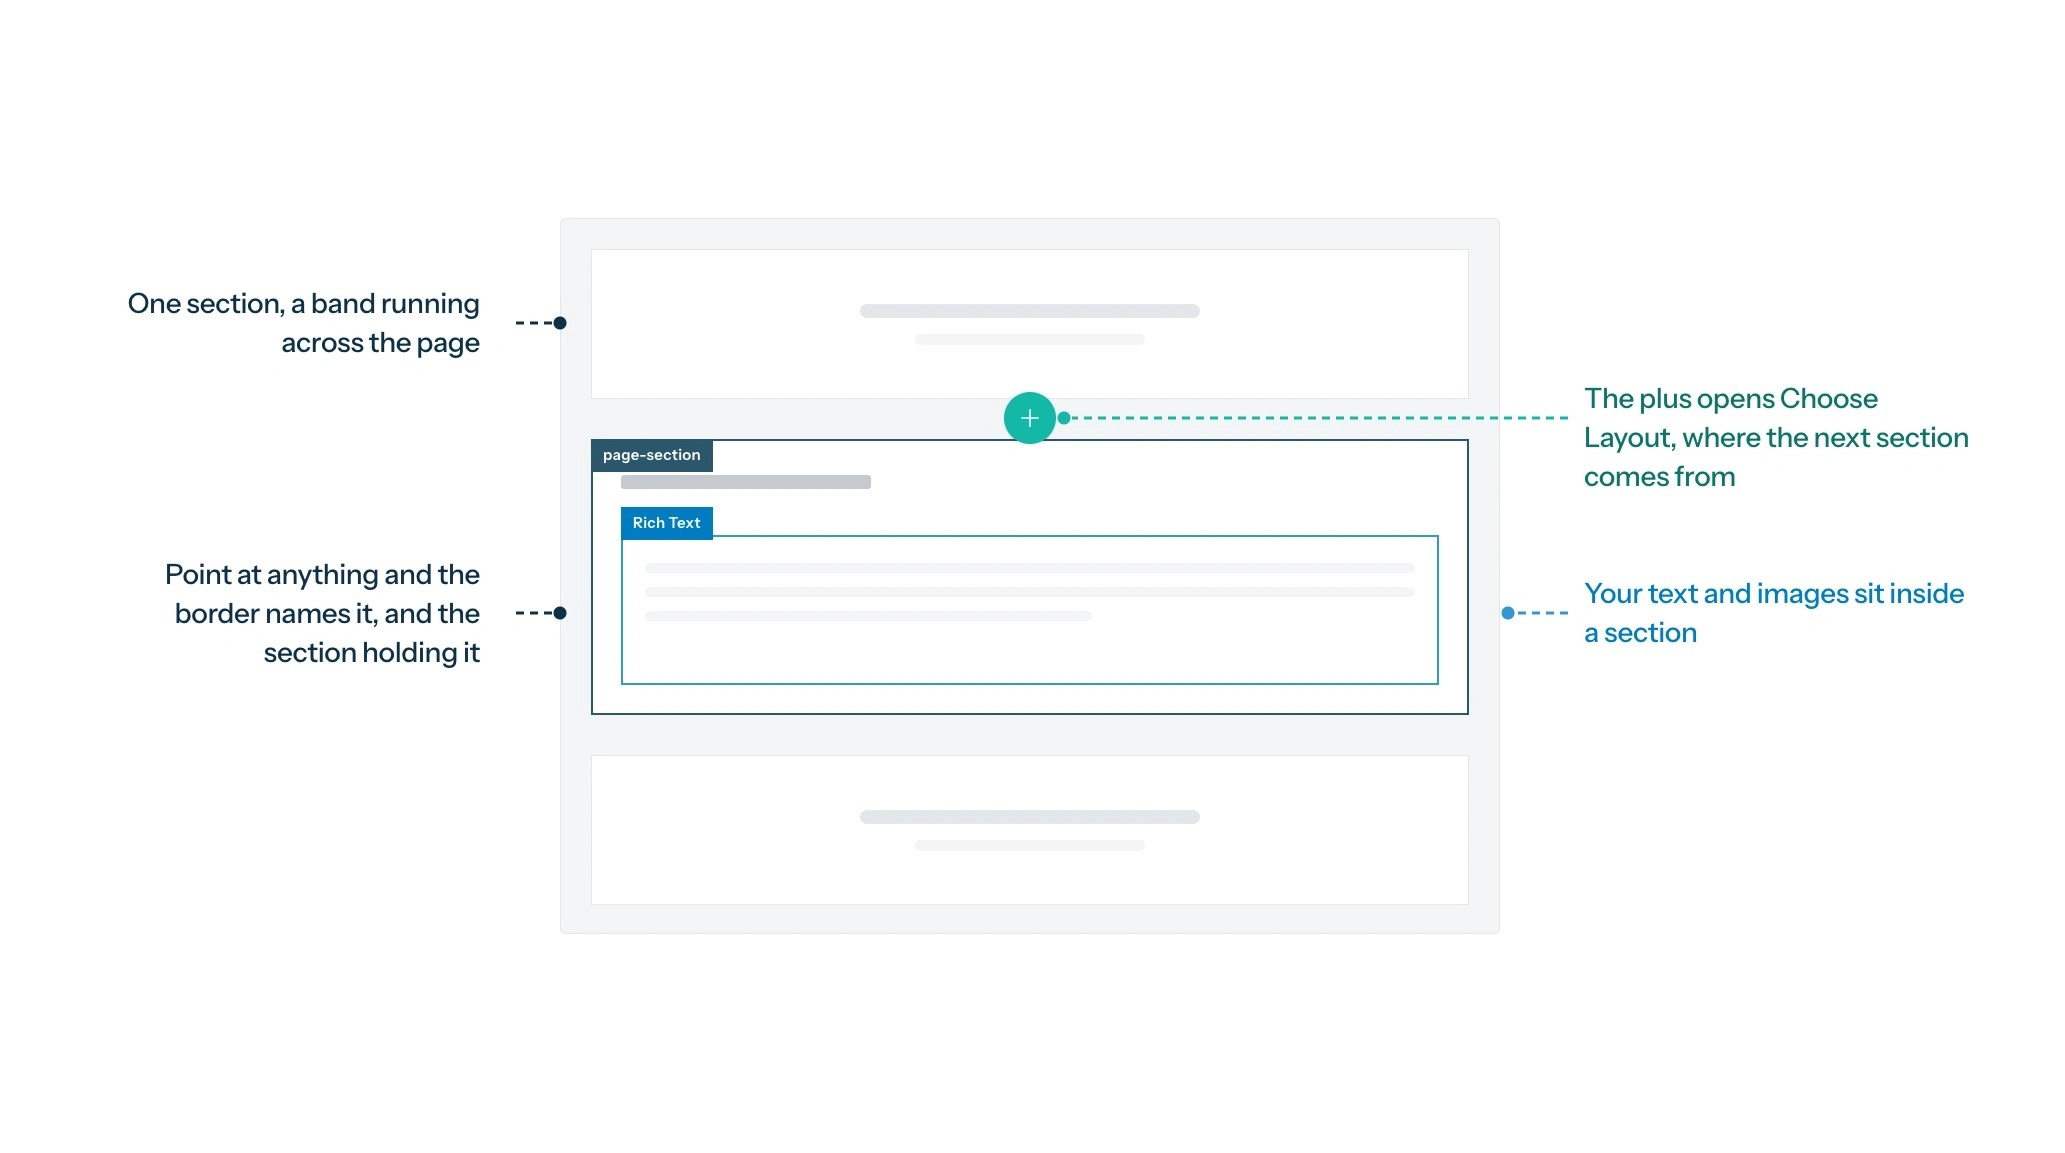
A page is a stack of sections, and your text and images sit inside them.
Click anything, and it stays selected, with a toolbar beside it for quick edits and its full settings in the panel on the right.
Adding A Section
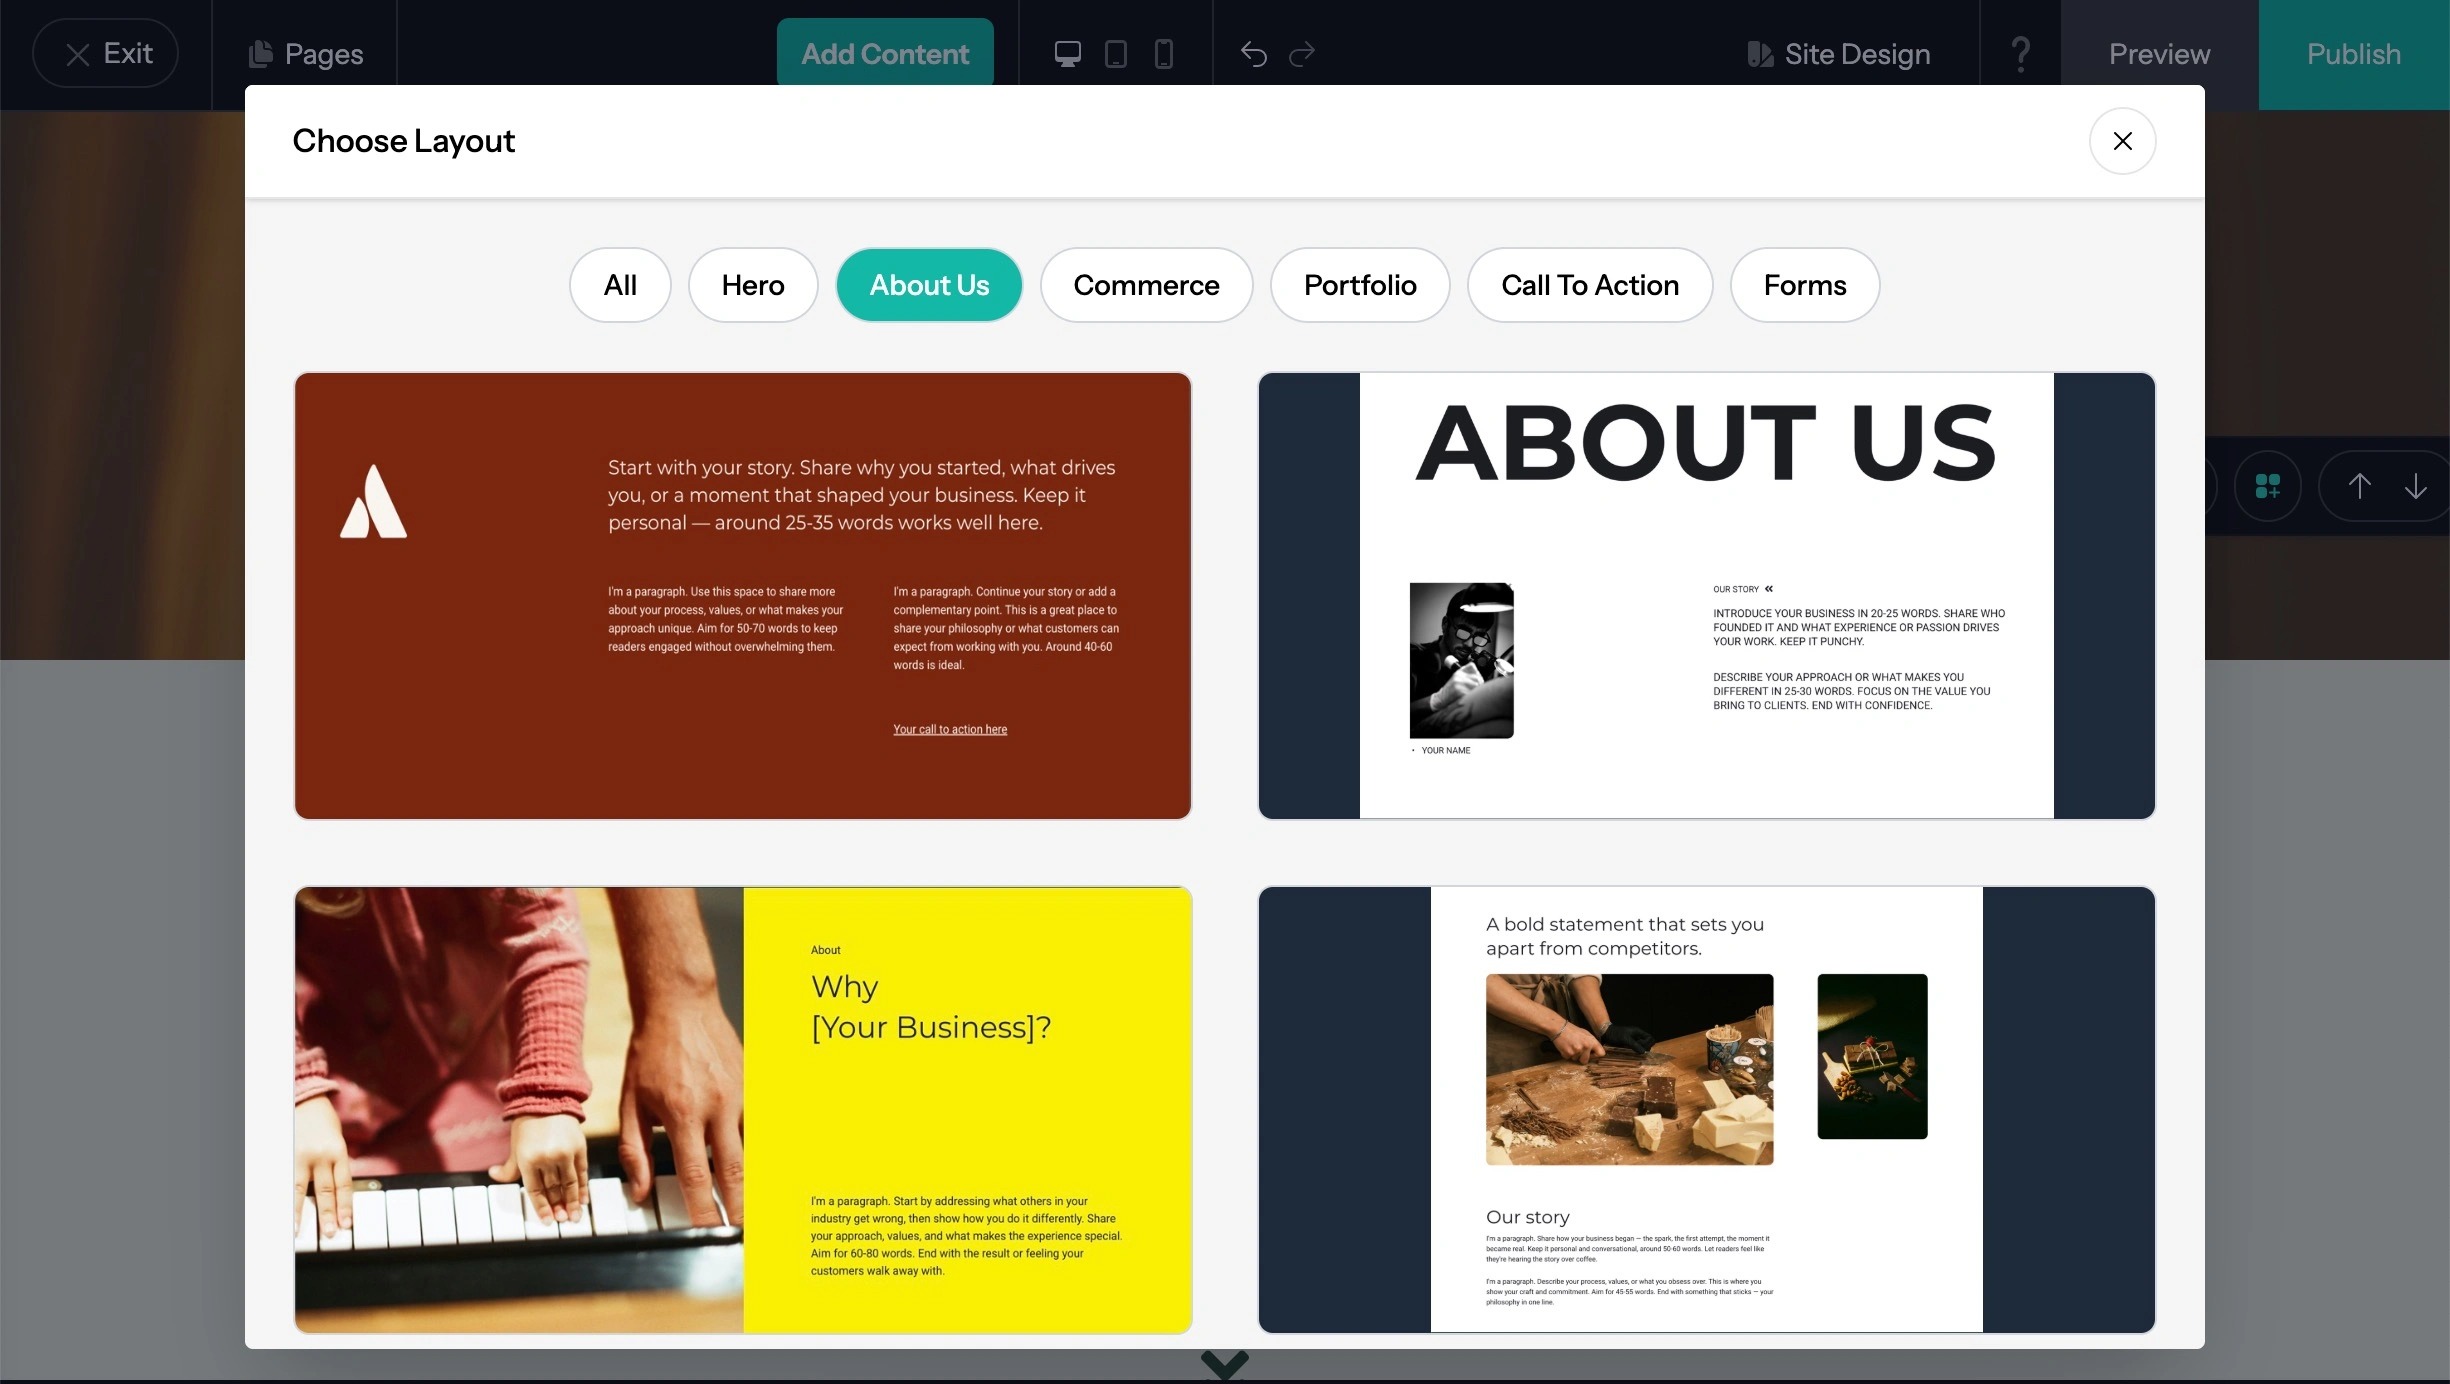
8. The plus opens Choose Layout, where you can use an empty section or a ready-made layout and add your own words and pictures.
Add Content
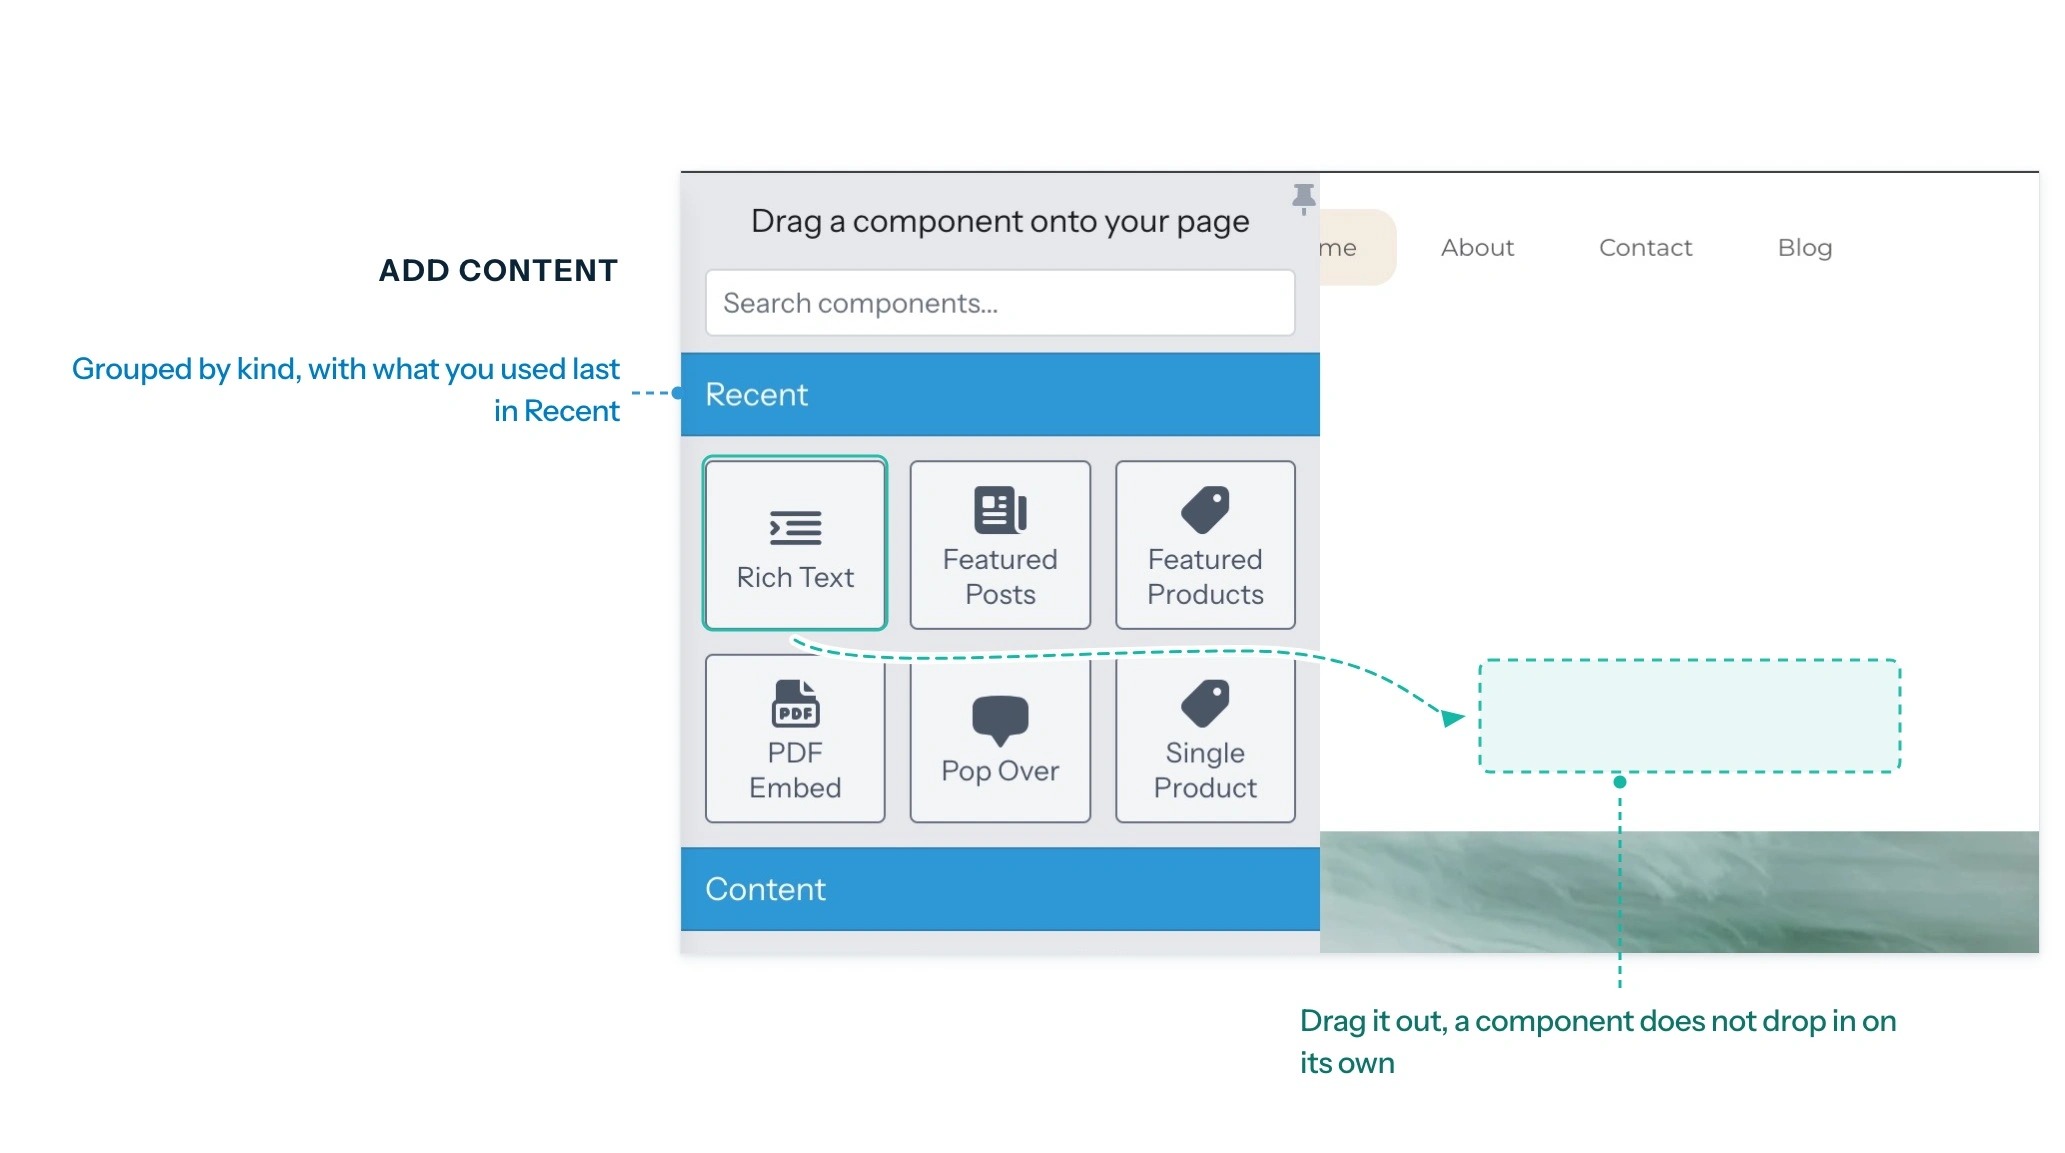
9. Add Content is where everything new on a page comes from.
The search box at the top is the quickest way in once you know a component by name.
The Panel On The Right
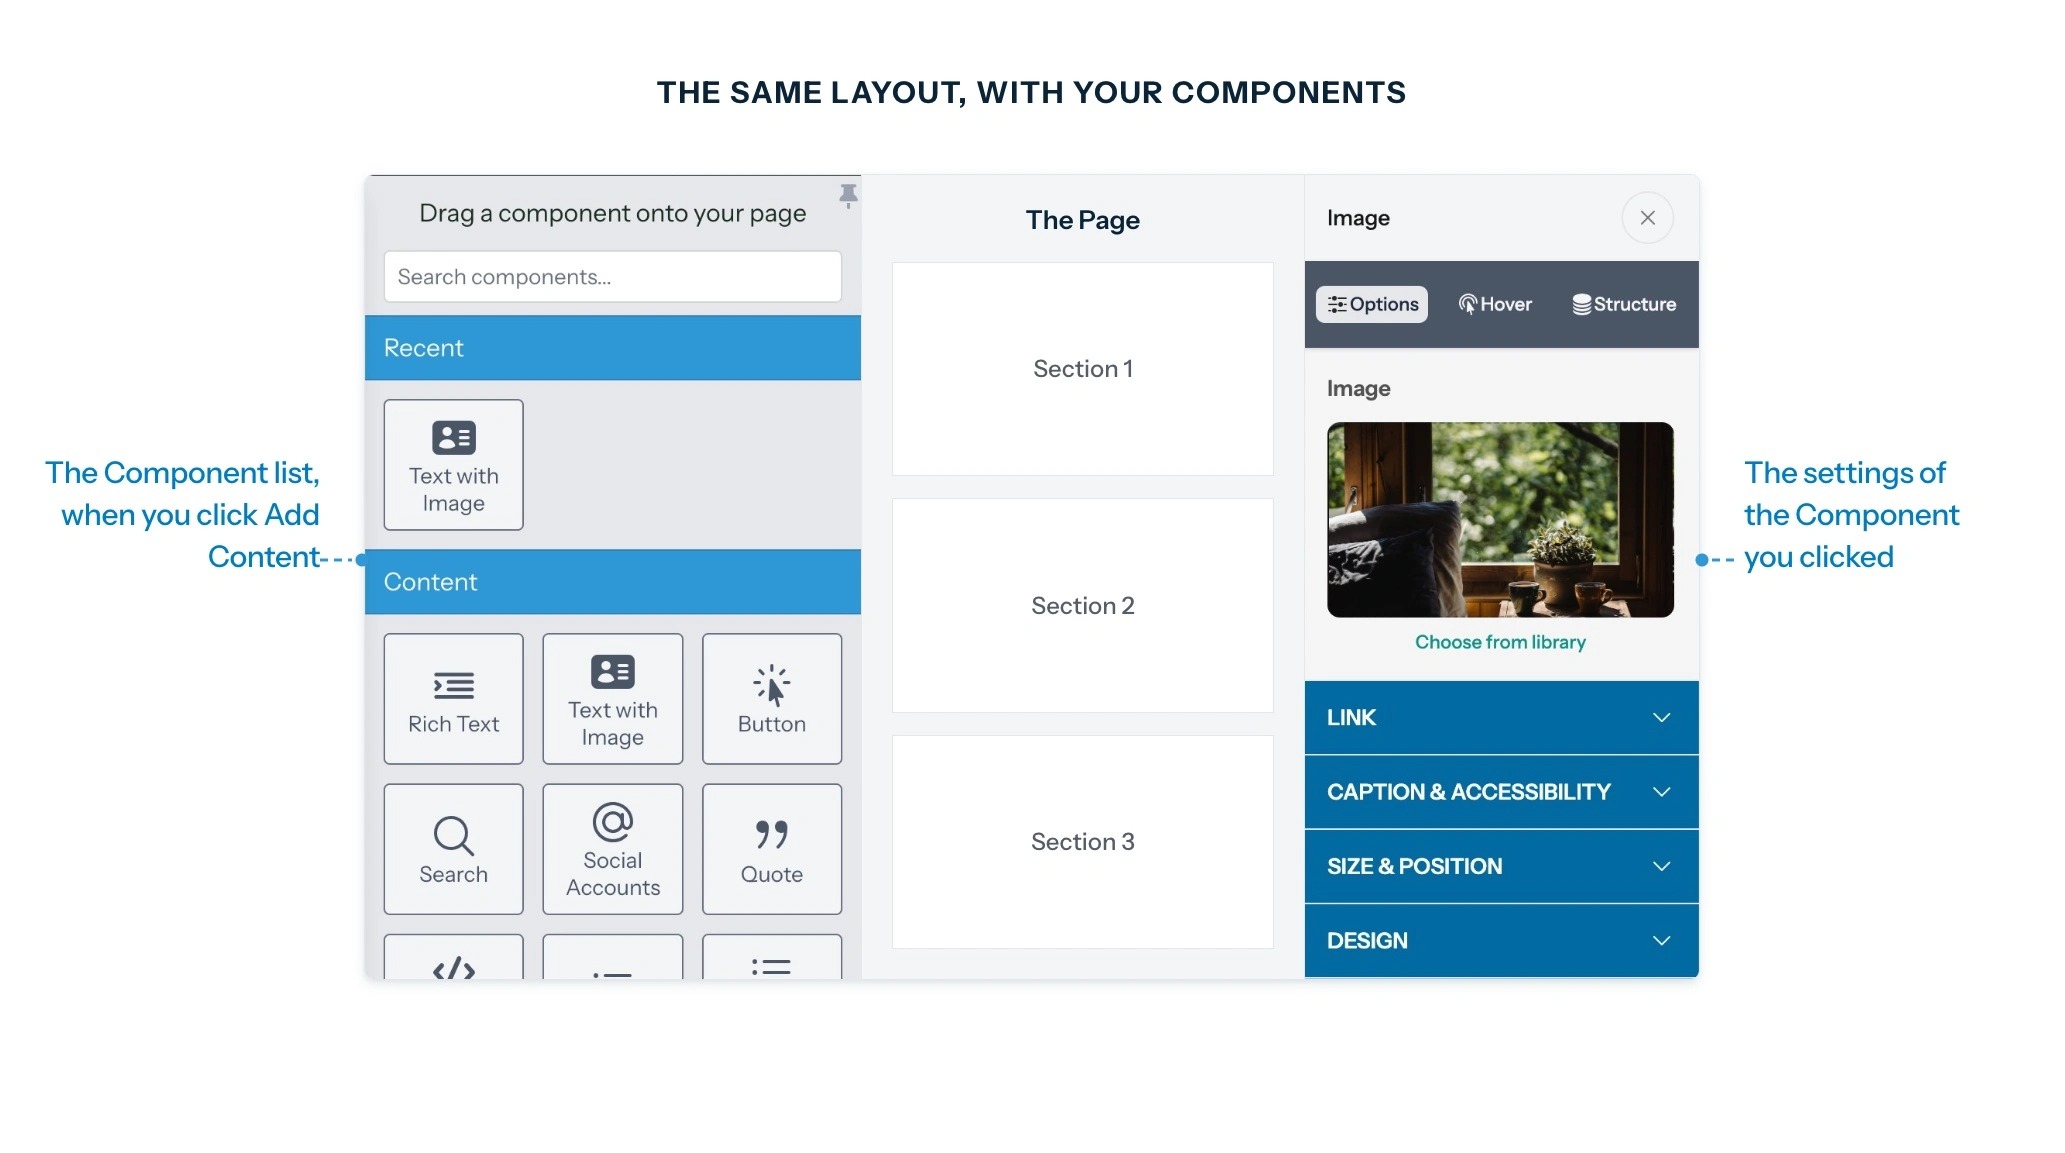
10. Select any component on the page, and its settings open here.
What you select decides what the panel holds, so the settings in front of you are only ever for that one thing.
Site Design
11. Site Design is the widest area in the editor. What you set here applies to every page at once, so changing a link or button color affects them all.
Your theme sits at the top, and everything below it changes the look within that theme rather than swapping it.
Under it come Styles for each kind of text and control, your site colors and background, and Shape, which sets how rounded corners are.
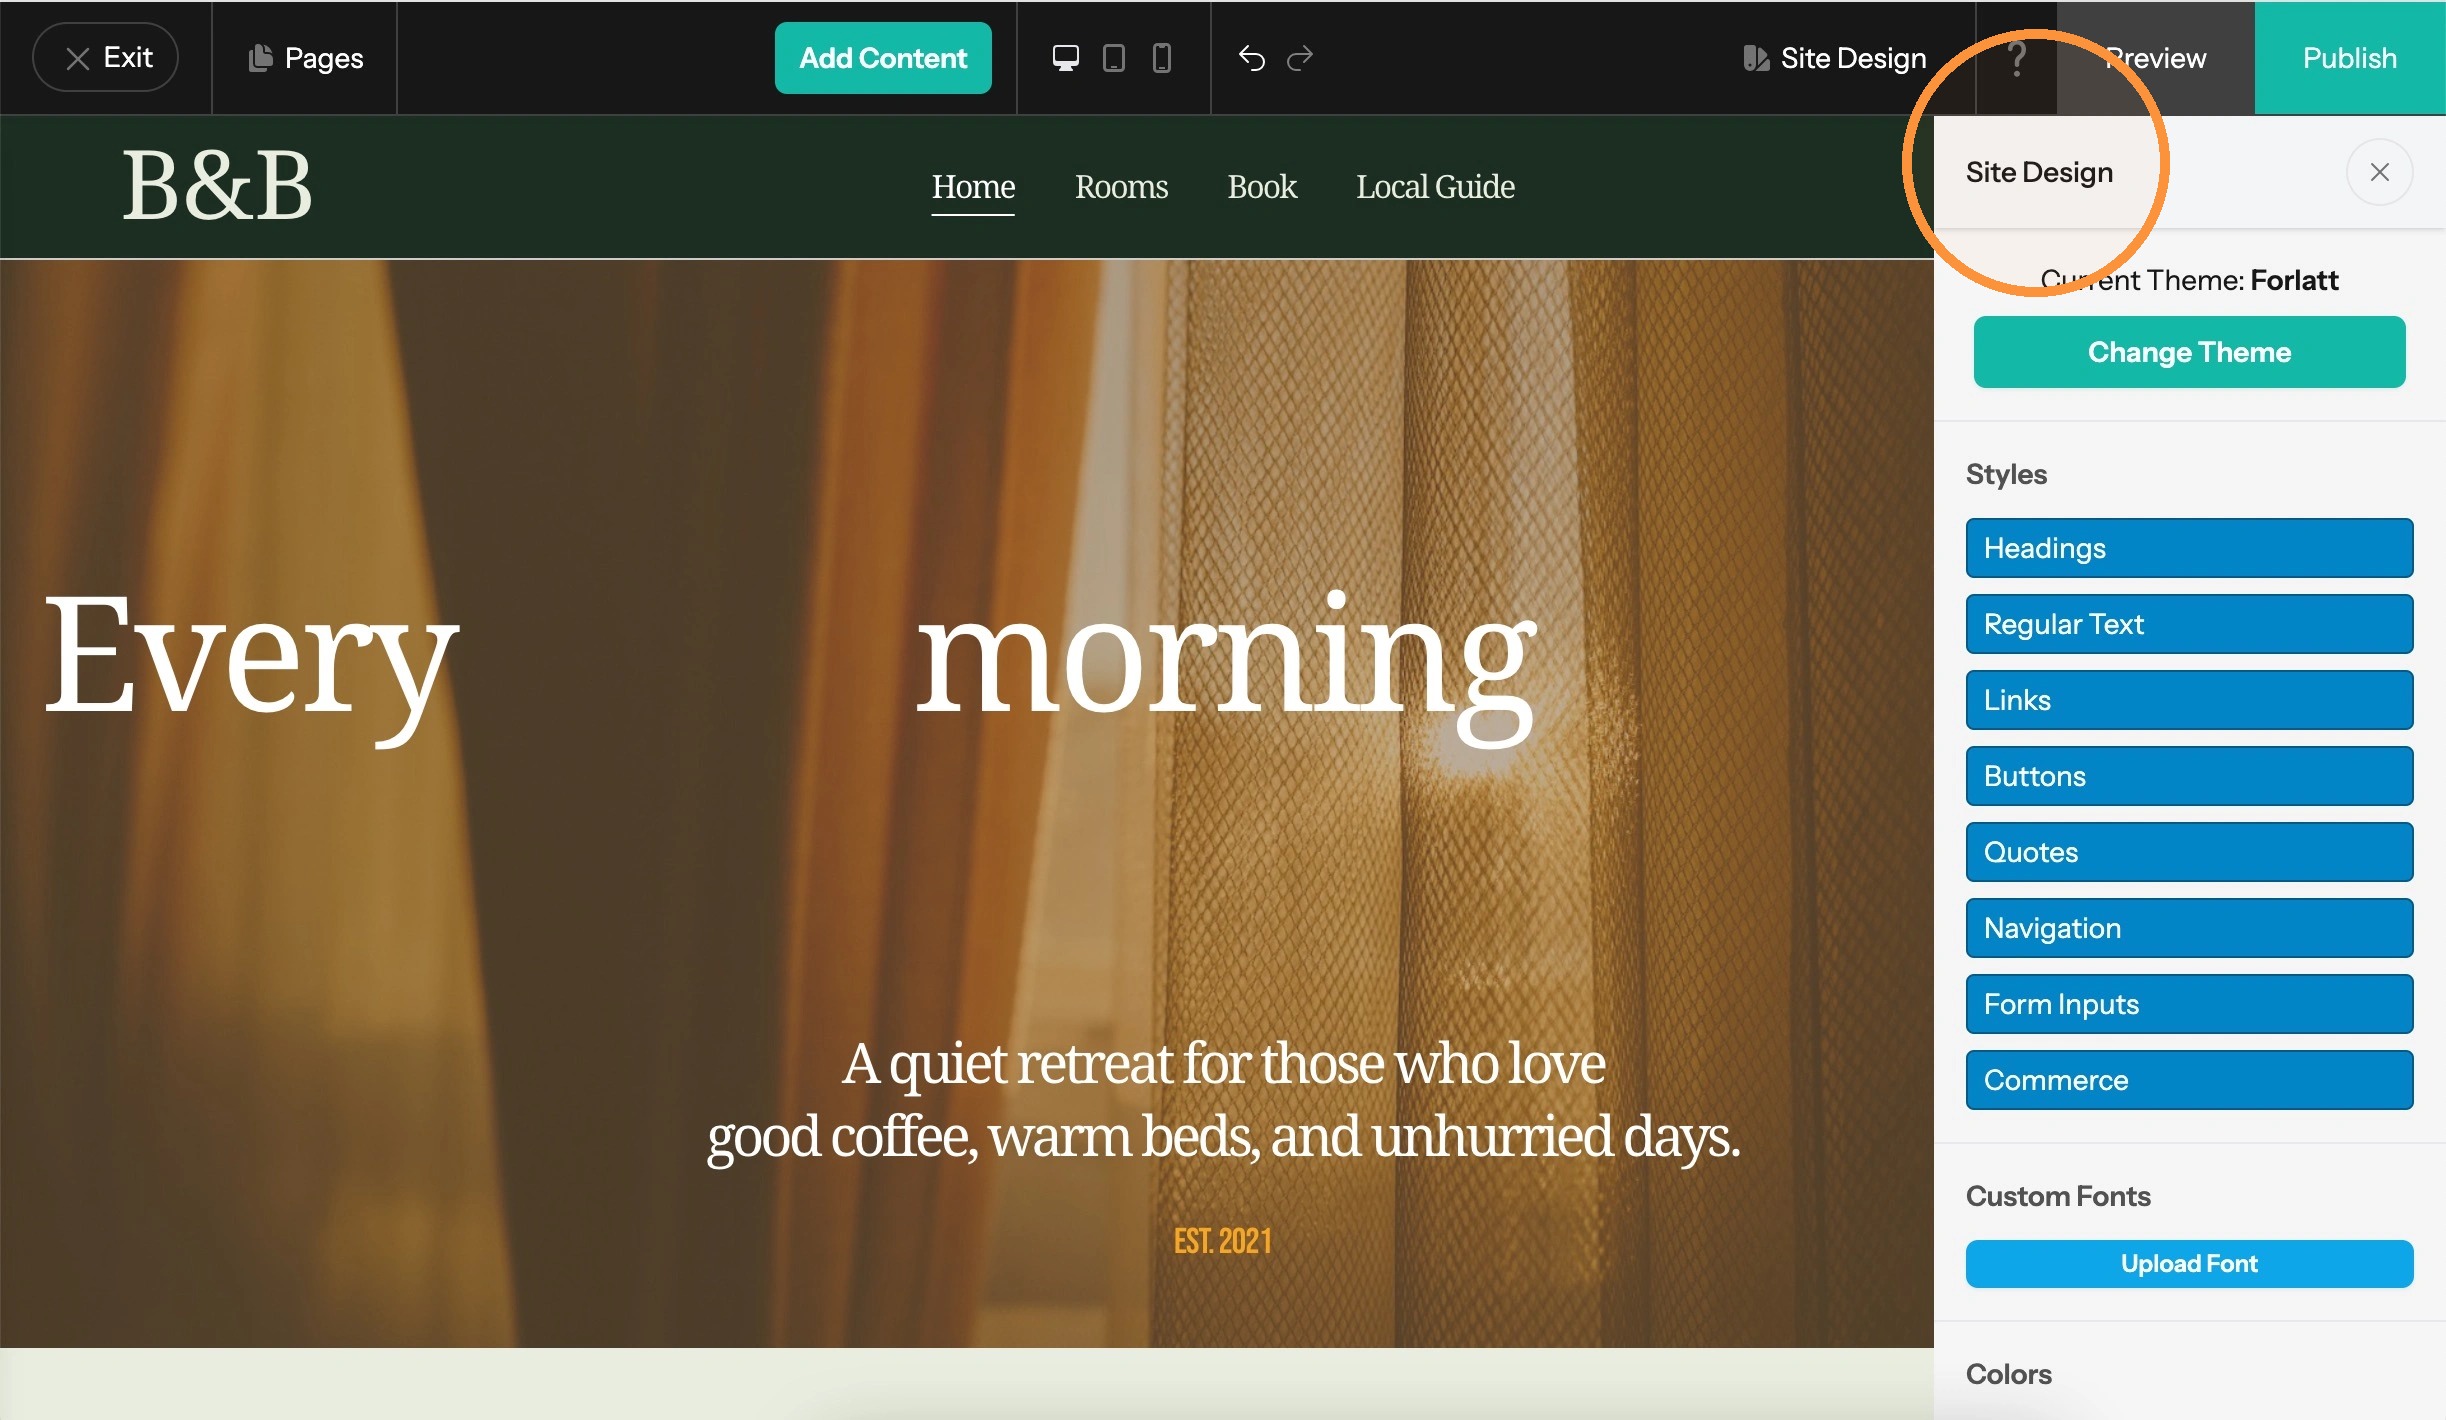
Tip: At the bottom, you can add a font of your own, and Site CSS under Advanced is where you write CSS by hand for anything the settings do not cover.
Preview
12. Preview opens your site in a new tab with the editor removed, so you see what a visitor sees. A line along the bottom marks it as a preview.
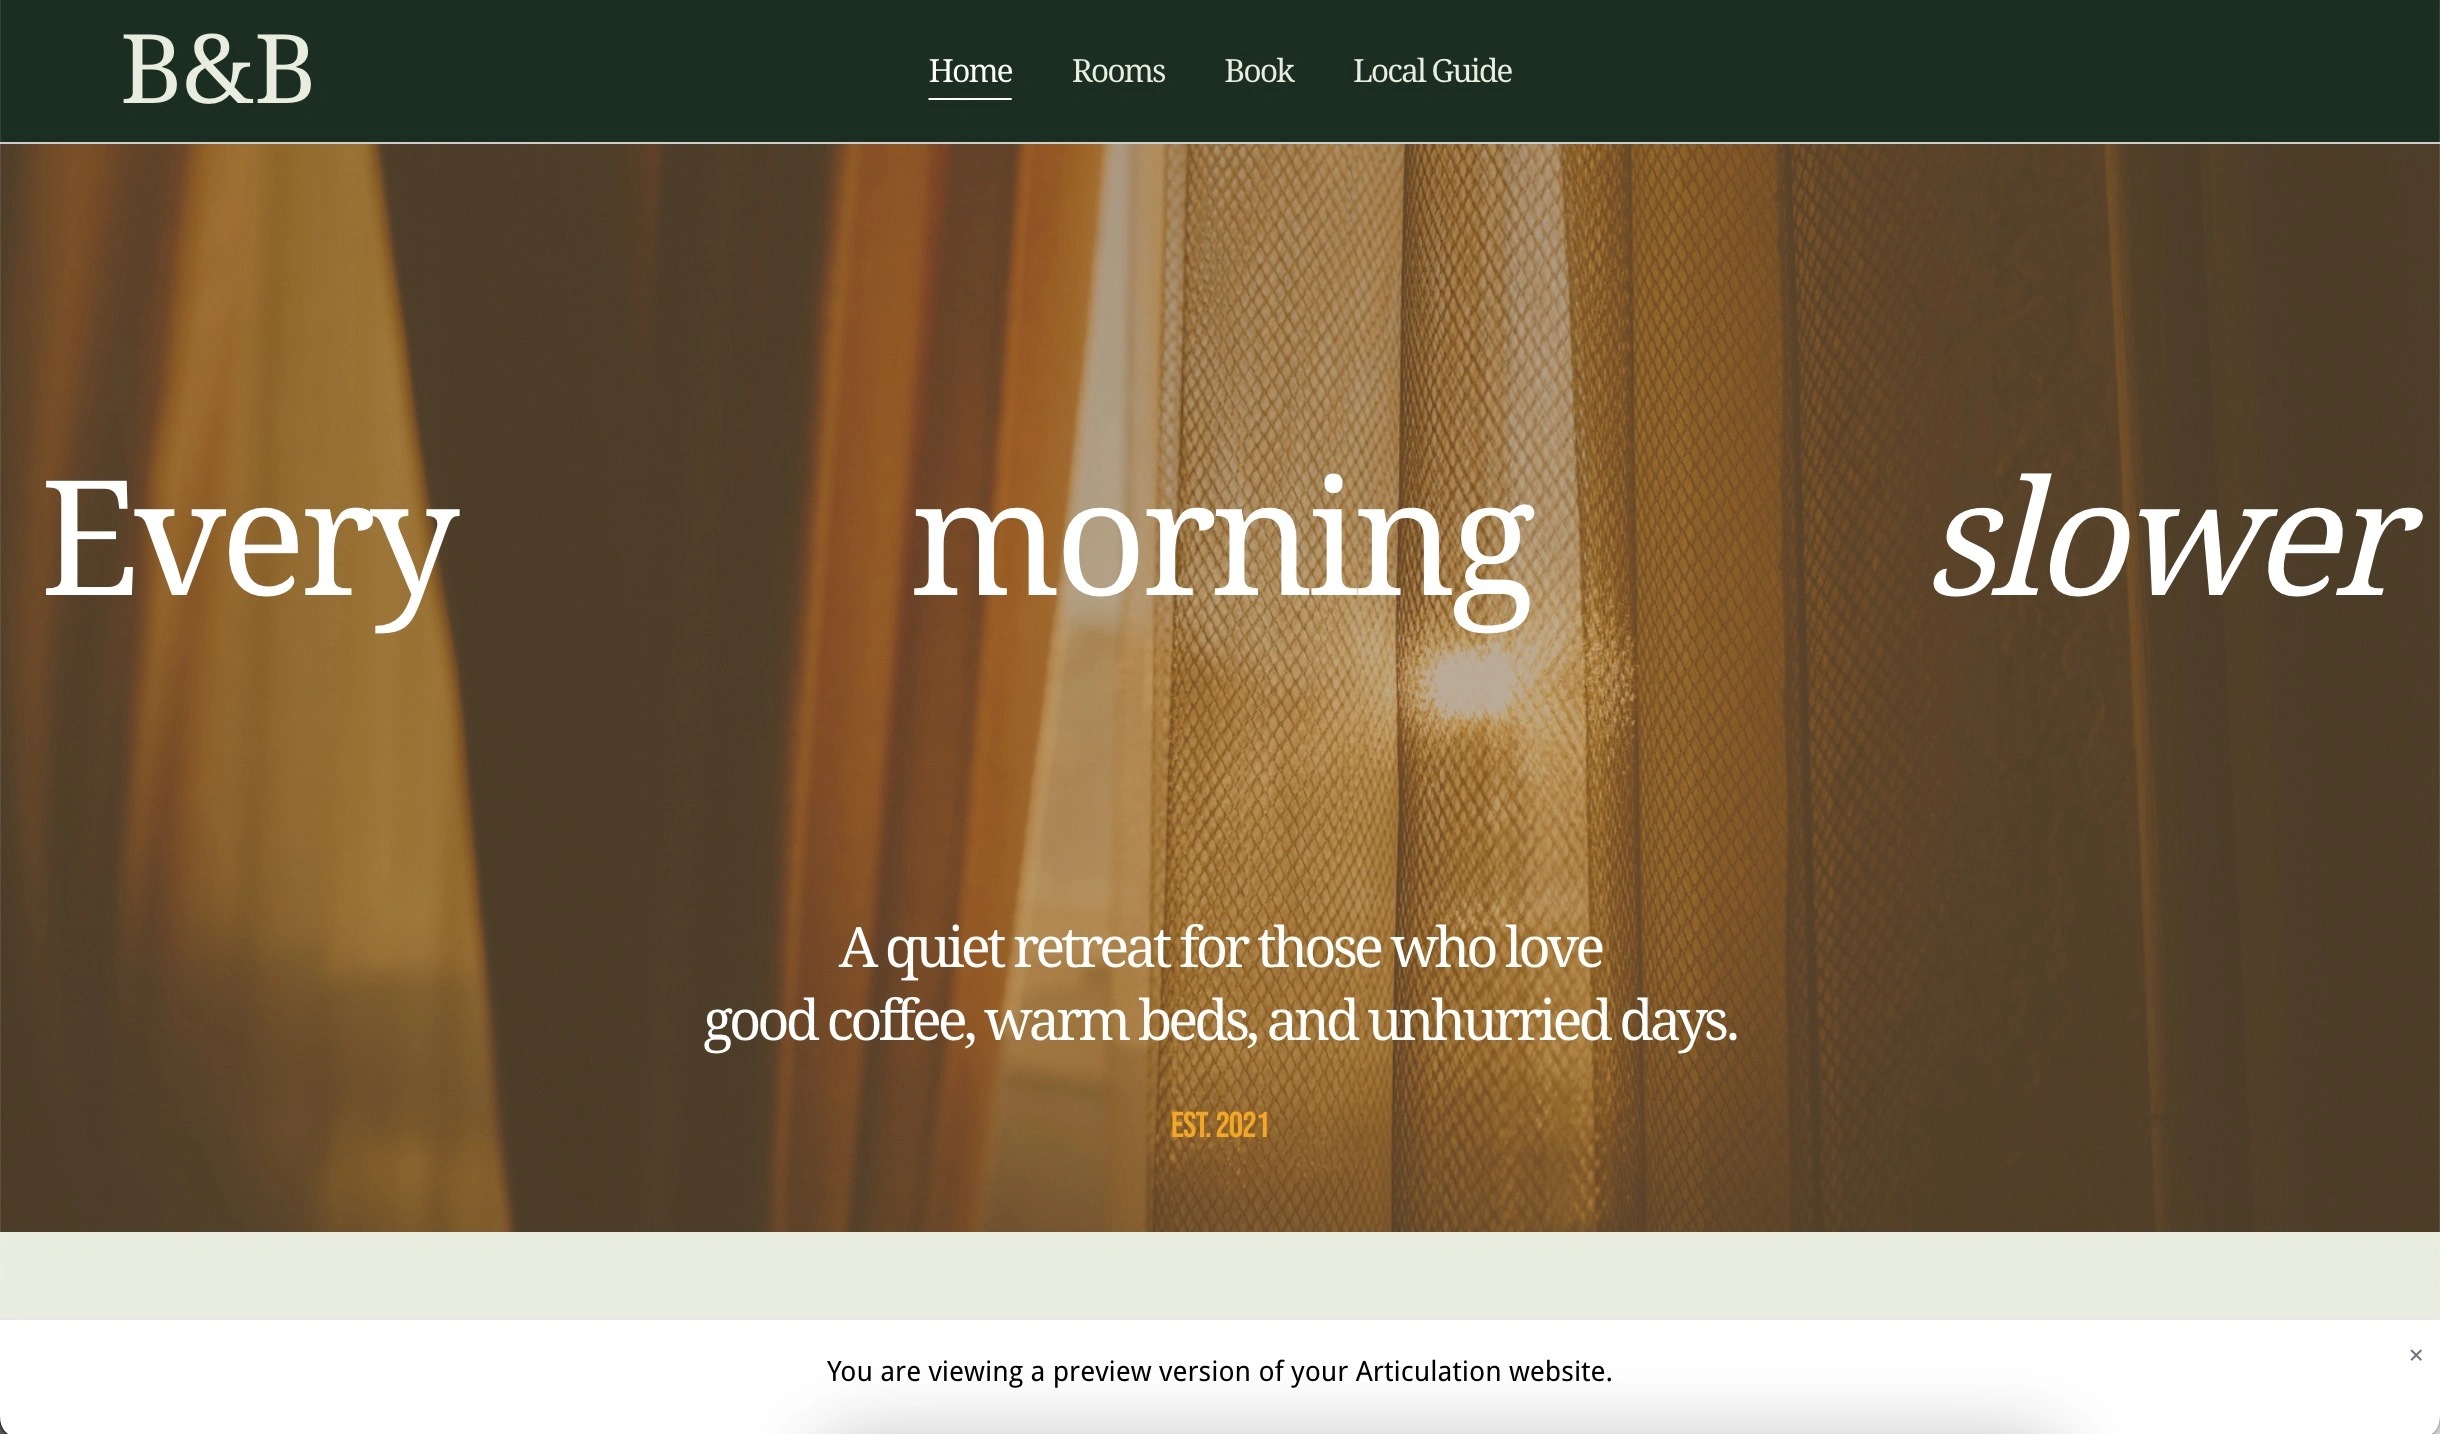
Tip: Links do not respond while you build, and anything that moves or plays sits still on the canvas so that it stays editable.
If a setting looks like it is doing nothing, check it in Preview before deciding it is broken.